Easy Mini Chicken Pot Pies Recipe
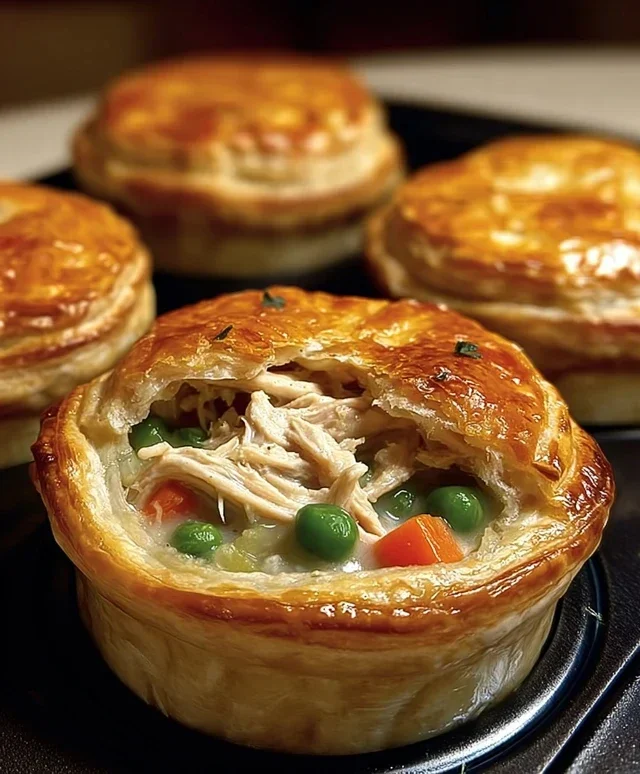
Mini Chicken Pot Pies are pure comfort food, bottled up into perfect, individual portions. There’s something undeniably heartwarming about the creamy, savory filling nestled beneath a flaky, golden crust. We all have those days, right? The ones where you crave something familiar, something that feels like a warm hug from the inside out. That’s exactly what these delightful mini chicken pot pies deliver. They’re a classic for a reason – the tender chicken, the medley of vegetables like peas and carrots, all swimming in a rich, velvety sauce. What makes them truly special, though, is the miniature presentation. Each little pie is a self-contained masterpiece, making them ideal for easy serving, delightful for packed lunches, or simply for enjoying that satisfying moment of breaking through the crust. Get ready to fall in love with this reimagin extracted favorite!
Mini Chicken Pot Pies
There’s something incredibly comforting about a warm, savory chicken pot pie. It’s a classic for a reason, delivering a delightful combination of flaky crust, creamy filling, and tender chicken. But sometimes, a full-sized pot pie feels like a commitment, or maybe you’re just looking for a more portion-controlled, individual serving. That’s where these Mini Chicken Pot Pies come in! They capture all the deliciousness of their larger counterparts but in a charming, single-serving format that’s perfect for weeknight dinners, entertaining, or even a special lunch. Imagin extracte individual golden domes of flaky biscuit dough, hiding a rich, flavorful chicken and vegetable filling. They’re surprisingly easy to make, requiring minimal prep and a few pantry staples. So, let’s dive into creating these delightful little comfort food stars.
Ingredients:
Getting Started: Preparing Your Pot Pie Components
Before we begin extract assembling, let’s get everything ready. This ensures a smooth and efficient cooking process. The first step is to prepare our chicken. You’ll want to dice the boneless chicken breast into small, bite-sized pieces. Aim for roughly ½-inch cubes. This ensures the chicken will cook evenly and be distributed nicely throughout the filling. You can cook the chicken beforehand if you prefer, by sautéing it in a pan until cooked through, or you can add it directly to the filling mixture if you’re confident it will cook within the baking time. For this recipe, we’ll assume you’re adding it raw and it will cook as the pot pies bake. Next, gather your frozen peas and carrots. There’s no need to thaw them; they’ll cook perfectly right from frozen. Finally, locate your cream of chicken soup, garlic powder, onion powder, and salt. Having everything measured and within reach will make the assembly process a breeze.
Assembling Your Mini Pot Pies
Now for the fun part – bringin extractg these mini pot pies to life!
1. Preheating and Preparing Muffin Tins: Begin extract by preheating your oven to 375°F (190°C). This is a moderate temperature that allows the biscuits to puff up and turn golden brown without burning. Next, take your standard muffin tin – the kind with 12 cups – and generously spray each cup with cooking spray. This is a crucial step to prevent the biscuit dough from sticking. If you don’t have cooking spray, you can lightly grease the muffin tin with butter or oil, but cooking spray offers the most reliable non-stick surface for these delicate pastry creations. You want to ensure that when your pot pies are done, they slide out easily.
2. Creating the Pot Pie Filling: In a medium-sized bowl, combine the diced chicken breast, frozen peas and carrots, cream of chicken soup, garlic powder, onion powder, and salt. Stir everything together gently but thoroughly until all the ingredients are well incorporated. The cream of chicken soup acts as our creamy, savory base, binding everything together and providing that classic pot pie flavor. The garlic and onion powders add depth and aromatic complexity, while the salt enhances all the other flavors. Taste a tiny bit of the mixture (if you’re comfortable doing so with raw chicken) or just trust the seasoning will be just right after baking. Make sure the chicken is distributed evenly throughout the mixture.
3. Forming the Biscuit Bases: Open your cans of refrigerated biscuits. You’ll be using all 16 biscuits. For each muffin cup, you will use one biscuit. Take a biscuit and gently flatten it out slightly with your hands. You want to create a sort of “cup” or base for the filling. Carefully press one flattened biscuit into the bottom of each prepared muffin cup, gently pushing it up the sides to create a small well. This well will hold our delicious filling. Don’t worry if the biscuit isn’t perfectly shaped; it will puff up and seal somewhat as it bakes. Ensure there are no large gaps at the bottom, as this could lead to filling leaking out.
4. Filling and Topping the Mini Pot Pies: Now, it’s time to spoon the prepared filling into the biscuit-lined muffin cups. Fill each cup about two-thirds of the way full. It’s important not to overfill, as this can cause the filling to bubble over and make a mess in your oven. Once you’ve filled all the cups, take another biscuit from your cans. For these top crusts, you have a couple of options. You can either flatten these biscuits slightly and place them directly on top of the filling, crimping the edges to seal them to the bottom biscuit, or you can get a little creative. For a more rustic look, you can cut these biscuits into quarters or even eighths and arrange them artfully on top, leaving some gaps for steam to escape. If you opt for a full top crust, be sure to make a small slit or two in the center with a knife to allow steam to escape, preventing the pastry from becoming soggy.
5. Baking to Golden Perfection: Place your filled muffin tin in the preheated oven. Bake for approximately 18-22 minutes, or until the biscuit crusts are puffed up, golden brown, and cooked through. The filling should be hot and bubbling, and the chicken should be cooked. You’ll know they’re ready when the tops are a lovely, inviting golden hue. Keep an eye on them, as oven temperatures can vary. If the tops are browning too quickly, you can loosely tent the muffin tin with aluminum foil. Once baked, carefully remove the muffin tin from the oven. Let the mini pot pies cool in the muffin tin for about 5-10 minutes. This allows them to set up slightly, making them easier to remove.
Serving Your Mini Masterpieces
Once they’ve cooled slightly, gently loosen the edges of the pot pies with a butter knife or small spatula, and carefully lift them out of the muffin tin. Serve them warm, perhaps with a side salad or some extra steamed vegetables. These mini chicken pot pies are perfect for a cozy dinner, a fun appetizer for a gathering, or even a delightful lunchbox treat. Enjoy the comforting flavors and the sheer joy of these individual, perfectly portioned pot pies!
Conclusion:
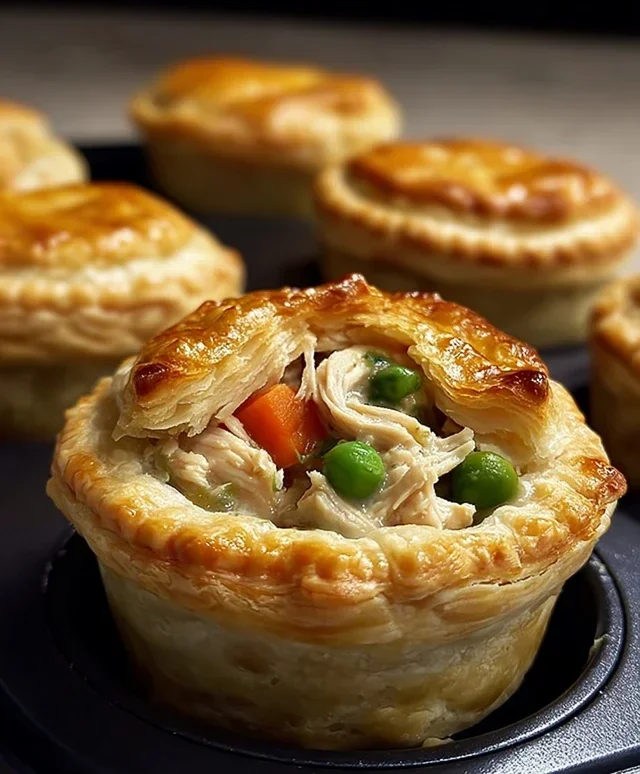
There you have it! Our Mini Chicken Pot Pies recipe is a delightful way to enjoy all the comforting flavors of a classic chicken pot pie, but in perfectly portioned, individual servings. These little delights are incredibly versatile, making them ideal for a weeknight family dinner, a charming appetizer for guests, or even a satisfying lunch. The flaky crust embracing a creamy, savory filling packed with tender chicken and vegetables is simply irresistible. I truly believe this recipe offers a fantastic balance of ease and deliciousness, making it a go-to in my own kitchen.
For serving suggestions, these mini pies are wonderful on their own, perhaps with a simple side salad dressed with a light vinaigrette. You could also pair them with mashed potatoes for an extra hearty meal, or serve them as part of a larger appetizer spread. Don’t be afraid to get creative with variations! Consider adding different vegetables like peas, corn, or even diced potatoes to the filling. For a touch of spice, a pinch of red pepper flakes can do wonders. And for a vegetarian option, simply swap the chicken for hearty mushrooms and extra vegetables.
I wholeheartedly encourage you to give these Mini Chicken Pot Pies a try. They’re a fantastic project that yields incredibly rewarding results. You’ll find yourself making them again and again!
Frequently Asked Questions:
Can I make these ahead of time?
Absolutely! You can prepare the filling and assemble the mini pot pies a day in advance. Store them covered in the refrigerator. You may need to add a few extra minutes to the baking time if baking from chilled. The crust might be slightly less flaky, but they will still be delicious.
What kind of crust works best?
While our recipe suggests a standard pie crust, you could also experiment with puff pastry for an extra light and airy topping, or even use pre-made biscuit dough pressed into the ramekins for a quicker, slightly different texture.
Can I freeze these mini pot pies?
Yes, you can! It’s best to freeze them unbaked. Assemble them in their ramekins, cover them tightly with plastic wrap, then foil, and freeze. When ready to bake, remove the foil and plastic wrap and bake from frozen, likely adding an additional 10-15 minutes to the baking time.
Mini Chicken Pot Pies
Quick and easy individual chicken pot pies using refrigerated biscuits for a flaky crust. Perfect for a weeknight meal or a fun appetizer.
Ingredients
-
2 cans refrigerated biscuits (8-count each)
-
½ lb boneless chicken breast, diced
-
1 cup frozen peas & carrots
-
1 can (10.5 oz) cream of chicken soup
-
½ tsp garlic powder
-
½ tsp onion powder
-
¼ tsp salt
-
Cooking spray
Instructions
-
Step 1
Preheat oven to 375°F (190°C). Lightly grease a 16-cup mini muffin tin with cooking spray. -
Step 2
In a medium bowl, combine the diced chicken breast, frozen peas & carrots, cream of chicken soup, garlic powder, onion powder, and salt. Mix well. -
Step 3
Separate the refrigerated biscuits. Flatten each biscuit slightly with your hands. -
Step 4
Press one flattened biscuit into the bottom and up the sides of each prepared mini muffin cup, forming a crust. -
Step 5
Spoon the chicken mixture evenly into each biscuit-lined muffin cup. -
Step 6
Place the muffin tin in the preheated oven and bake for 20-25 minutes, or until the biscuits are golden brown and the filling is bubbly. -
Step 7
Let the mini pot pies cool in the tin for a few minutes before carefully removing them. Serve warm.
Important Information
Nutrition Facts (Per Serving)
It is important to consider this information as approximate and not to use it as definitive health advice.
Allergy Information
Please check ingredients for potential allergens and consult a health professional if in doubt.