Soft Cutout Sugar Cookies- Easy Holiday Baking
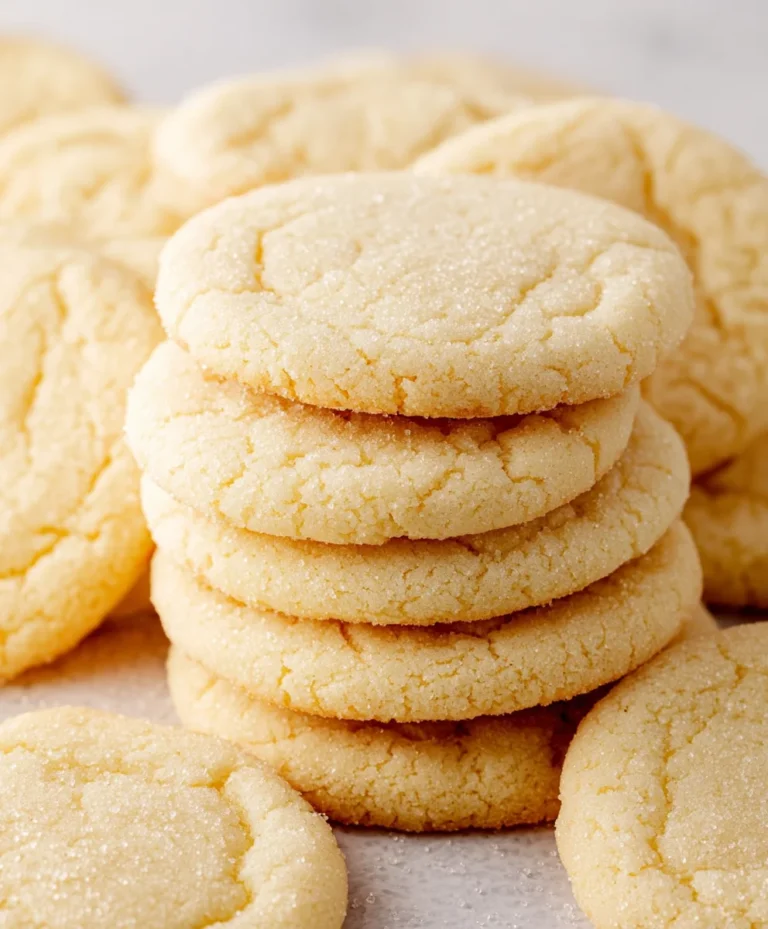
Soft Cutout Sugar Cookies are more than just a sweet treat; they’re a gateway to cherished memories and a canvas for boundless creativity. There’s a universal joy that washes over us when we bite into a perfectly tender sugar cookie, its delicate sweetness melting on the tongue. These aren’t your average hard, brittle cookies that shatter with every touch. Oh no, these are the kind that yield with a delightful, pillowy softness, making them an absolute dream to bake and even better to eat. What truly sets these soft cutout sugar cookies apart is their incredible versatility. Whether you’re decorating them for a festive holiday, a birthday celebration, or just because, their sturdy yet yielding texture holds frosting and sprinkles beautifully, transforming them into edible works of art. Get ready to fill your kitchen with the warm, comforting aroma of baking and create something truly special.

Ingredients:
- 2 ¾ cups all-purpose flour
- 1 teaspoon baking powder
- ½ teaspoon salt
- ¾ cup salted butter, softened at room temperature
- 1 cup granulated sugar
- 2 large eggs, at room temperature
- 1 teaspoon vanilla extract
- ½ teaspoon almond extract (or reduce to ¼ teaspoon for a more subtle flavor)
- 3 cups powdered sugar, sifted
- 3-4 tablespoons milk
- 2 tablespoons light corn syrup
- ½ teaspoon vanilla extract (for the frosting)
- Gel food coloring, optional
Making the Soft Cutout Sugar Cookie Dough
The key to perfect soft cutout sugar cookies lies in a well-balanced dough that’s easy to handle and bakes up tender. We’ll start by combining our dry ingredients. In a medium bowl, whisk together the 2 ¾ cups of all-purpose flour, 1 teaspoon of baking powder, and ½ teaspoon of salt. Whisking ensures that the leavening agent and salt are evenly distributed throughout the flour, which is crucial for consistent baking. Set this aside for now.
In a large bowl, cream together the ¾ cup of softened salted butter and 1 cup of granulated sugar. This step is best done with an electric mixer, either a stand mixer with a paddle attachment or a hand mixer. Beat them together on medium speed until the mixture is light, fluffy, and pnon-alcoholic ale yellow. This process incorporates air into the butter and sugar, which contributes to the tender texture of the cookies. Scrape down the sides of the bowl periodically to ensure everything is incorporated.
Next, we’ll add the wet ingredients to the creamed butter and sugar mixture. Beat in the 2 large eggs, one at a time, mixing well after each addition. It’s important that your eggs are at room temperature; this helps them emulsify better with the butter and sugar, resulting in a smoother dough. Once the eggs are fully incorporated, stir in 1 teaspoon of vanilla extract and ½ teaspoon of almond extract. The almond extract adds a subtle depth of flavor that complements the vanilla beautifully, but feel free to adjust it if you prefer a less pronounced almond note.
Now, it’s time to combine the dry ingredients with the wet. Gradually add the flour mixture to the butter mixture, mixing on low speed until just combined. Be careful not to overmix at this stage, as overmixing can develop the gluten in the flour, leading to tougher cookies. Once the dough just starts to come together, you might need to switch to a spatula or your hands to finish incorporating any remaining flour. The dough should be soft but not overly sticky. If it seems too dry, you can add a tablespoon of milk at a time until it reaches the right consistency. Divide the dough in half, flatten each half into a disc, wrap them tightly in plastic wrap, and refrigerate for at least 2 hours, or preferably overnight. Chilling the dough is a vital step; it allows the gluten to relax and the fats to firm up, making the dough easier to roll and cut without spreading too much during baking.
Rolling, Cutting, and Baking the Cookies
Once your dough is thoroughly chilled, it’s time to roll and cut. Preheat your oven to 350°F (175°C). Line baking sheets with parchment paper. This prevents sticking and makes for easy cleanup. Lightly flour your work surface and your rolling pin. Take one disc of chilled dough and place it on the floured surface. Roll the dough out to a thickness of about ¼ inch. Aim for an even thickness so that all your cookies bake at the same rate. If the dough becomes too soft to handle while rolling, return it to the refrigerator for 10-15 minutes. Using your favorite cookie cutters, cut out shapes from the rolled dough. Reroll scraps gently only once or twice to avoid toughening the dough.
Carefully transfer the cut-out cookies to the prepared baking sheets, leaving about 1 inch of space between each cookie. This allows for some spread during baking. Bake for 8-12 minutes, or until the edges are lightly golden and the centers appear set. The exact baking time will depend on the size and thickness of your cookies. Keep a close eye on them in the last few minutes of baking. Once baked, let the cookies cool on the baking sheets for 5 minutes before transferring them to a wire rack to cool completely. This initial cooling on the sheet helps them firm up enough to be moved without breaking.
Crafting the Perfect Royal Icing
While your cookies cool, let’s prepare the royal icing, which will make these soft cutout sugar cookies truly shine. In a large bowl, combine the 3 cups of sifted powdered sugar with 3-4 tablespoons of milk. Start with 3 tablespoons of milk and add more, a teaspoon at a time, until you reach your desired consistency. You’re looking for a smooth, pipeable icing that’s not too thin and not too thick. If it’s too thin, it will run off the cookies; if it’s too thick, it will be difficult to pipe smoothly.
Add 2 tablespoons of light corn syrup and ½ teaspoon of vanilla extract to the powdered sugar and milk mixture. The corn syrup adds a beautiful sheen and also helps prevent the icing from drying out too quickly. Beat everything together until it’s smooth and glossy. If you plan to color your icing, divide it into smaller bowls now. Add a tiny drop of gel food coloring to each bowl and stir until the color is uniform. Gel food coloring is concentrated, so a little goes a long way. Continue mixing until the icing is completely smooth and free of lumps. For the smoothest icing, you can use an electric mixer on low speed, but be careful not to overmix, which can introduce air bubbles.
Decorating Your Soft Cutout Sugar Cookies
Once your cookies are completely cool, it’s time for the fun part: decorating! You can use piping bags fitted with various tips, or even plastic Ziploc bags with a corner snipped off for a simpler approach. For an outline and flood effect, first pipe an outline around the edge of each cookie. Let this outline set for about 10-15 minutes. Then, use a slightly thinner consistency of icing (you might need to add another drop or two of milk) to fill in the center of the cookie. You can use a toothpick to spread the icing to the edges and to pop any air bubbles. Allow the decorated cookies to dry completely, which can take several hours or even overnight, depending on humidity and the thickness of the icing, before storing or serving them.

Conclusion:
We’ve reached the sweet end of our journey making the most delightful Soft Cutout Sugar Cookies! This recipe delivers on its promise of a tender, slightly chewy cookie that holds its shape beautifully when cut, making it perfect for all your festive decorations. Whether you’re a seasoned baker or just starting out, these cookies are sure to bring joy to your kitchen and smiles to everyone who tastes them. Don’t be afraid to experiment with different shapes and icing colors to truly make them your own!
These Soft Cutout Sugar Cookies are incredibly versatile. Serve them plain for a simple, sweet treat, or get creative with royal icing, sprinkles, and edible glitter for a truly spectacular display. They are fantastic for holiday celebrations, birthdays, or just as a thoughtful homemade gift. For an added touch of flavor, consider incorporating a hint of almond extract alongside the vanilla, or even a pinch of cinnamon for a warm, cozy note.
We truly hope you enjoy baking and decorating these Soft Cutout Sugar Cookies as much as we do. Remember, the most important ingredient is always the love you put into them. So, gather your loved ones, put on some cheerful music, and let the baking magic begin extract!
Frequently Asked Questions about Soft Cutout Sugar Cookies:
Why are my Soft Cutout Sugar Cookies spreading too much?
This can happen for a few reasons. Ensure your butter and sugar are properly creamed, but not over-creamed, which can incorporate too much air. Also, chilling the dough adequately before rolling and cutting is crucial. If the dough is too warm, it will spread more during baking. Baking at the correct temperature, not too low, also helps set the cookies quickly.
Can I make the dough for these Soft Cutout Sugar Cookies ahead of time?
Absolutely! The dough for Soft Cutout Sugar Cookies actually benefits from chilling. You can prepare the dough, wrap it tightly in plastic wrap, and refrigerate it for up to 3 days. When ready to bake, let the dough sit at room temperature for about 10-15 minutes to become pliable enough to roll, but still remain chilled for optimal cutting and baking results.
Soft Cutout Sugar Cookies- Easy Holiday Baking
Easy and delicious soft cutout sugar cookies perfect for holiday baking, complete with a simple royal icing recipe.
Ingredients
-
2 ¾ cups all-purpose flour
-
1 teaspoon baking powder
-
½ teaspoon salt
-
¾ cup salted butter, softened at room temperature
-
1 cup granulated sugar
-
2 large eggs, at room temperature
-
1 teaspoon vanilla extract
-
½ teaspoon almond extract
-
3 cups powdered sugar, sifted
-
3-4 tablespoons milk
-
2 tablespoons light corn syrup
-
½ teaspoon vanilla extract (for the frosting)
-
Gel food coloring, optional
Instructions
-
Step 1
In a medium bowl, whisk together 2 ¾ cups all-purpose flour, 1 teaspoon baking powder, and ½ teaspoon salt. In a large bowl, cream together ¾ cup softened salted butter and 1 cup granulated sugar until light and fluffy. Beat in 2 large eggs, one at a time, then stir in 1 teaspoon vanilla extract and ½ teaspoon almond extract. Gradually add the flour mixture to the butter mixture, mixing on low speed until just combined. Divide dough in half, flatten into discs, wrap tightly, and refrigerate for at least 2 hours. -
Step 2
Preheat oven to 350°F (175°C). Line baking sheets with parchment paper. Lightly flour work surface and rolling pin. Roll out one disc of chilled dough to about ¼ inch thickness. Cut out shapes using cookie cutters. Reroll scraps gently only once or twice. -
Step 3
Carefully transfer cut-out cookies to prepared baking sheets, leaving 1 inch between cookies. Bake for 8-12 minutes, or until edges are lightly golden and centers appear set. Let cookies cool on baking sheets for 5 minutes before transferring to a wire rack to cool completely. -
Step 4
While cookies cool, prepare royal icing. In a large bowl, combine 3 cups sifted powdered sugar with 3-4 tablespoons milk, starting with 3 tablespoons and adding more as needed to reach a smooth, pipeable consistency. Add 2 tablespoons light corn syrup and ½ teaspoon vanilla extract. Beat until smooth and glossy. If coloring, divide icing and add gel food coloring to desired shades. -
Step 5
Once cookies are completely cool, decorate. Pipe an outline around the edge of each cookie and let it set for 10-15 minutes. Fill the center with a slightly thinner icing consistency. Use a toothpick to spread icing and pop air bubbles. Allow decorated cookies to dry completely before storing or serving.
Important Information
Nutrition Facts (Per Serving)
It is important to consider this information as approximate and not to use it as definitive health advice.
Allergy Information
Please check ingredients for potential allergens and consult a health professional if in doubt.