Easy Amish White Bread Recipe-Soft & Delicious
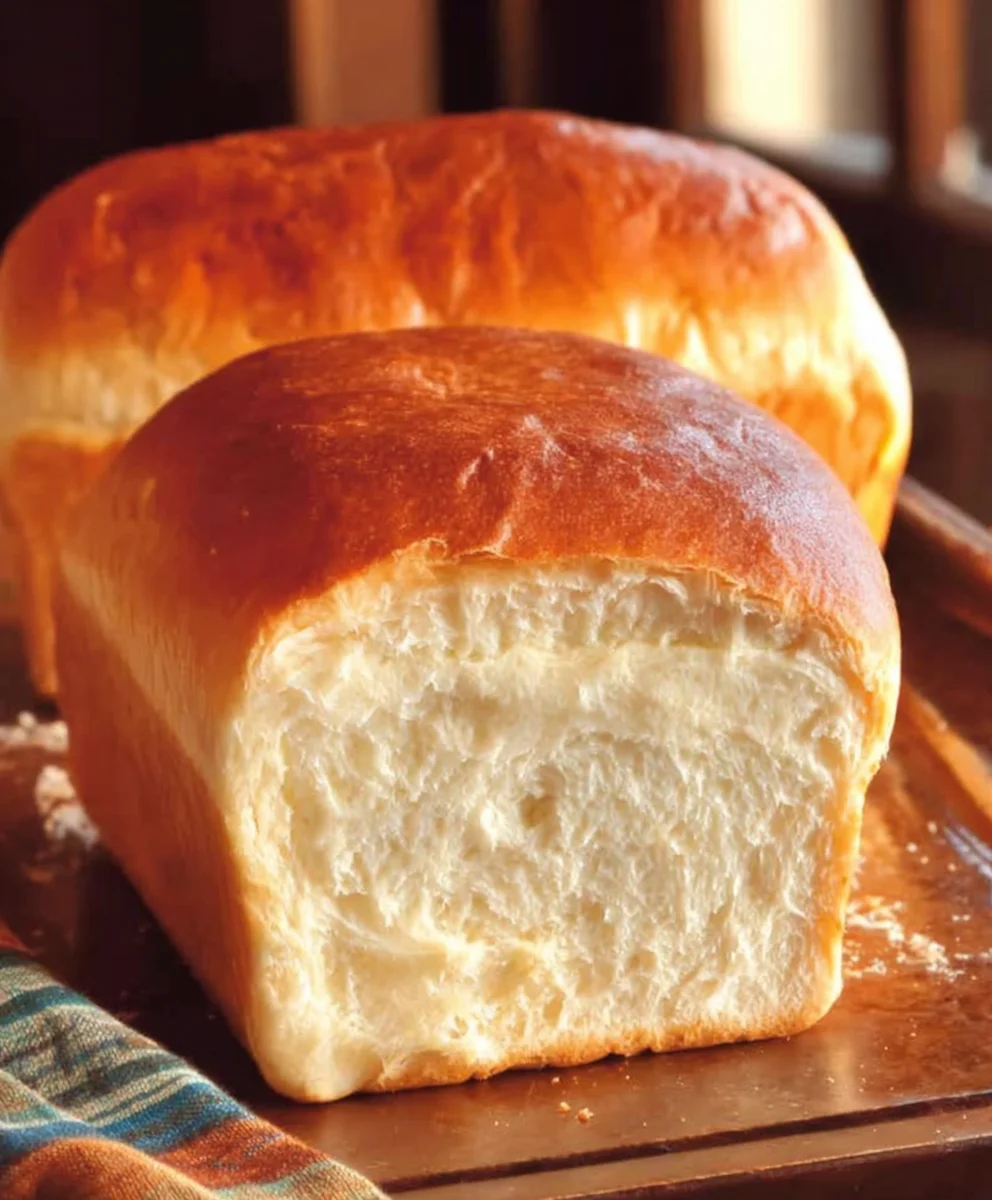
Amish White Bread Recipe. There’s something profoundly comforting about a slice of warm, homemade white bread, and this Amish White Bread Recipe delivers that nostalgic perfection. For generations, families have turned to this simple yet elegant recipe for a loaf that’s both incredibly tender and beautifully golden. What is it about this particular bread that captures our hearts and taste buds? It’s the pure, unadulterated flavor, the soft, pillowy crum extractb that’s perfect for slathering with butter or jam, and the satisfyingly simple process of bringin extractg deliciousness to life in your own kitchen. We love it because it’s a taste of tradition, a blank canvas for your favorite spreads, and a testament to the beauty of simple ingredients. This Amish White Bread Recipe isn’t just about baking; it’s about creating memories and sharing a piece of culinary heritage.
Ingredients:
- 1 cup water (lukewarm, about 110F)
- 1 pinch ground gin extractger (optional – this acts as a natural activator for the yeast)
- 1 cup milk (lukewarm, about 110F)
- 2/3 cup granulated sugar (feel free to reduce this amount if you prefer a less sweet bread)
- 1 1/2 tablespoons active dry yeast
- 1 1/2 teaspoons salt
- 1/4 cup vegetable oil (or melted coconut oil cooled to about 100F, or melted unsalted butter)
- 5-1/2 cups bread flour (you might need slightly more or less depending on humidity)
- 2 tablespoons unsalted butter (melted, for greasing)
Mixing the Dough
This is where the gin extractic begins, and it all starts with activating your yeast. In a large mixing bowl, combine the lukewarm water and milk. The temperature is crucial here; too hot and you’ll kill the yeast, too cold and it won’t activate properly. Aim for a temperature that feels comfortably warm to the touch, like a baby’s bath. If you’re using the optional gin extractch of ground ginger, stir it in now. Next, sprinkle the active dry yeast over the liquid. Let this mixture sit for about 5-10 minutes. You should see it start to get foamy and bubbly on the surface, which is a sure sign your yeast is alive and ready to work its wonders. If it doesn’t foam, your yeast might be old or the liquid was too hot, and you’ll need to start again with fresh yeast.
Once your yeast is active, add the granulated sugar to the bowl and stir it in. The sugar provides food for the yeast, helping it to produce the carbon dioxide that will make your bread light and airy. Now, add the salt and the vegetable oil (or your chosen alternative like cooled melted coconut oil or melted butter). Stir everything together gently. If you’re using bread flour, it has a higher protein content, which will result in a chewier loaf with a better structure, perfect for this kind of bread. Gradually add the bread flour, about a cup at a time, mixing after each addition. Initially, you can use a spoon or a sturdy spatula. As the dough starts to come together and becomes too stiff to stir, it’s time to get your hands in there.
Kneading the Dough
Turn the dough out onto a lightly floured surface. Now comes the satisfying process of kneading. If the dough feels very sticky, add a little more flour, just a tablespoon at a time, until it’s manageable but still slightly tacky. Kneading develops the gluten in the flour, which gives bread its structure and texture. Push the dough away from you with the heels of your hands, then fold it over on itself. Rotate the dough a quarter turn and repeat. Continue this process for about 8-10 minutes. You’ll know you’ve kneaded it enough when the dough becomes smooth, elastic, and springs back slowly when you poke it with your finger. It should no longer stick excessively to your hands or the work surface. Be patient with this step; proper kneading is key to a great loaf of Amish White Bread.
First Rise (Proofing)
Lightly grease a clean large bowl with a bit of oil or cooking spray. Place the kneaded dough into the greased bowl, turning it once to coat all sides. Cover the bowl tightly with plastic wrap or a clean, damp kitchen towel. Find a warm, draft-free place for the dough to rise. Your oven, with just the light on, is often an ideal spot. Let the dough rise for about 1 to 1.5 hours, or until it has doubled in size. This is the first proofing, and it’s where the yeast does its most significant work, creating those lovely air pockets. Resist the urge to poke or prod it too much during this time; let it do its thing undisturbed.
Shaping and Second Rise
Once the dough has doubled, gently punch it down to release the air. Turn the dough out onto your lightly floured surface again and divide it into two equal portions for two loaves, or into smaller portions if you prefer rolls. For classic loaves, shape each portion into a smooth ball by tucking the edges under. Then, gently flatten the ball into a rectangle, about 8×10 inches. From the long edge, roll up the dough tightly, pinching the seam to seal. Tuck the ends under to create a neat loaf shape. Place the shaped loaves into two greased 9×5 inch loaf pans. Ensure the pans are well-greased with your melted butter or oil to prevent sticking. Cover the pans loosely with plastic wrap or a clean kitchen towel and let them rise again in a warm place for about 45-60 minutes, or until they have risen about an inch above the rim of the pans. This second rise is important for achieving that beautiful, tall loaf.
Baking the Bread
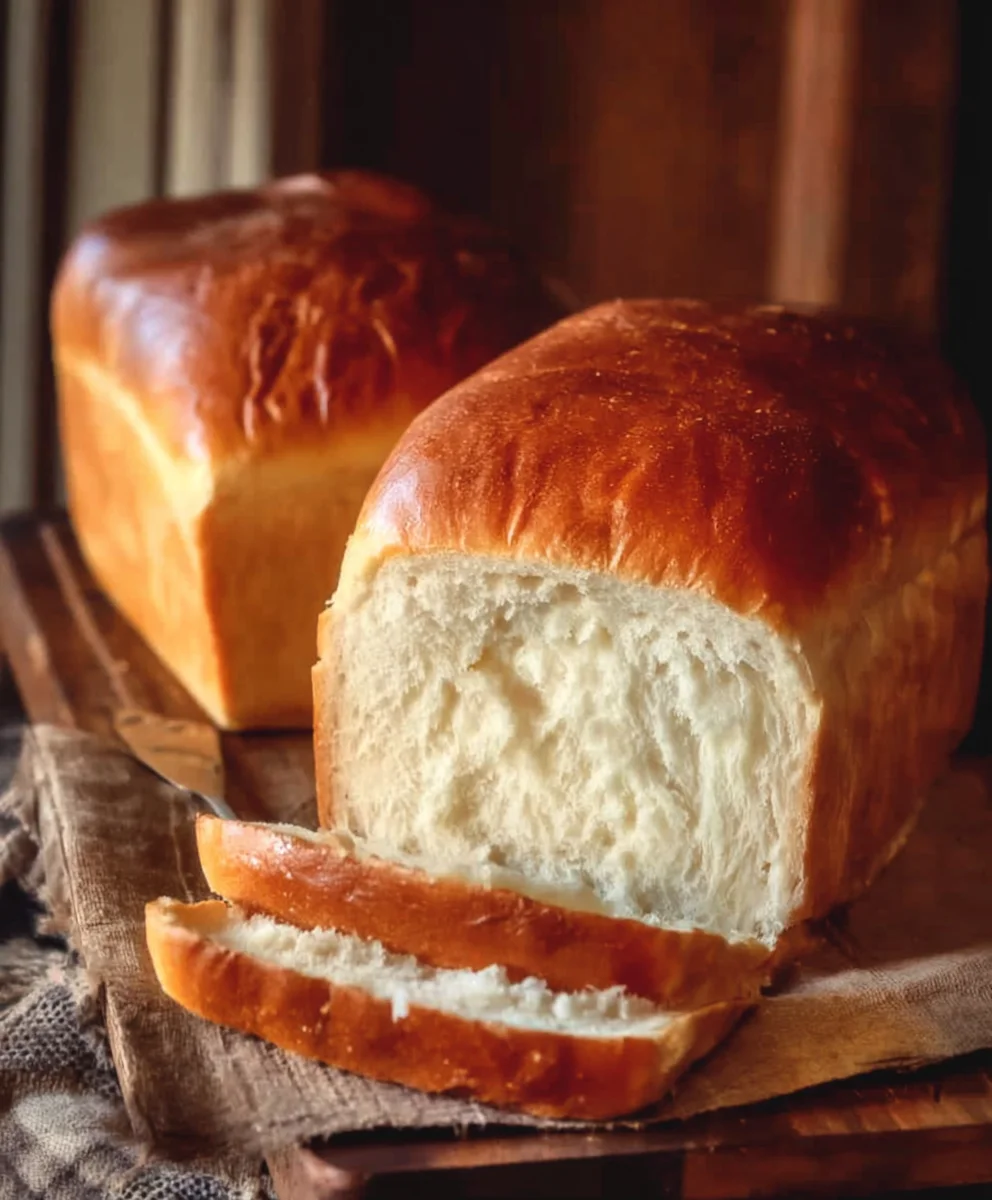
Preheat your oven to 375F (190C) during the last 15 minutes of the second rise. When the dough has completed its second rise, remove the plastic wrap or towel. You can optionally brush the tops of the loaves with a little milk or egg wash for a golden sheen. Carefully place the loaf pans into the preheated oven. Bake for 30-35 minutes, or until the crust is a deep golden brown and the internal temperature of the bread reaches 190-200F (88-93C) when tested with an instant-read thermometer. If the tops start to brown too quickly, you can loosely tent them with aluminum foil. Once baked, immediately remove the loaves from their pans and place them on a wire rack to cool completely. This is crucial for allowing steam to escape and preventing a soggy bottom crust. Enjoy the aroma of freshly baked Amish White Bread filling your kitchen!
Conclusion:
And there you have it! You’ve successfully navigated the simple yet rewarding process of baking our delightful Amish White Bread Recipe. This recipe truly embodies the comforting, wholesome goodness that is so characteristic of Amish baking. The resulting loaf is wonderfully soft, with a delicate crum extractb and a slightly chewy crust, perfect for any occasion. We hope you enjoy the process as much as we do, and that this Amish White Bread Recipe becomes a staple in your kitchen. Don’t be afraid to get your hands a little floury; the satisfaction of pulling a warm, fragrant loaf from your oven is unparalleled. Enjoy it slathered with butter, used for hearty sandwiches, or even as a base for your favorite toast toppings. Happy baking!
Frequently Asked Questions:
Can I freeze the Amish White Bread Recipe once it’s baked?
Absolutely! Once the Amish White Bread Recipe has cooled completely, you can wrap it tightly in plastic wrap and then place it in a freezer-safe bag or container. It should keep well in the freezer for up to 3 months. To enjoy, thaw at room temperature or gently reheat in a low oven.
What are some other ways to use the Amish White Bread Recipe besides sandwiches?
This versatile Amish White Bread Recipe is fantastic for so much more than just sandwiches! It makes incredible French toast, croutons, bread pudding, or simply toasted and served with jam. Its mild flavor complements both sweet and savory dishes beautifully.
My Amish White Bread Recipe didn’t rise as much as I expected. What could have gone wrong?
Several factors can affect bread rise. Ensure your yeast was fresh and properly activated. Also, check the temperature of your liquids; too hot can kill yeast, and too cold can slow it down significantly. Make sure you allowed adequate time for proofing in a warm, draft-free environment. Sometimes, a slightly cooler kitchen can impact rise.
Easy Amish White Bread Recipe-Soft & Delicious
A soft, delicious, and easy-to-make Amish White Bread recipe perfect for sandwiches or toasting. This recipe features a simple yeast activation process and comes out wonderfully fluffy.
Ingredients
-
1 cup water (lukewarm, about 110F)
-
1 pinch ground ginger (optional – this acts as a natural activator for the yeast)
-
1 cup milk (lukewarm, about 110F)
-
2/3 cup granulated sugar (feel free to reduce this amount if you prefer a less sweet bread)
-
1 1/2 tablespoons active dry yeast
-
1 1/2 teaspoons salt
-
1/4 cup vegetable oil (or melted coconut oil cooled to about 100F, or melted unsalted butter)
-
5-1/2 cups bread flour (you might need slightly more or less depending on humidity)
-
2 tablespoons unsalted butter (melted, for greasing)
Instructions
-
Step 1
In a large mixing bowl, combine the lukewarm water and milk. Stir in the optional ground ginger if using. Sprinkle the active dry yeast over the liquid and let it sit for 5-10 minutes until foamy. -
Step 2
Add the granulated sugar, salt, and vegetable oil (or your chosen alternative) to the yeast mixture. Stir gently. Gradually add the bread flour, about a cup at a time, mixing until a dough begins to form. -
Step 3
Turn the dough out onto a lightly floured surface and knead for 8-10 minutes until smooth and elastic. The dough should be manageable and slightly tacky. -
Step 4
Place the kneaded dough in a lightly greased bowl, cover, and let rise in a warm place for 1 to 1.5 hours, or until doubled in size. -
Step 5
Punch down the dough and divide it into two equal portions. Shape each portion into a smooth loaf and place into two greased 9×5 inch loaf pans. Cover and let rise for 45-60 minutes, or until about an inch above the rim. -
Step 6
Preheat your oven to 375F (190C). Bake for 30-35 minutes until deep golden brown and the internal temperature reaches 190-200F (88-93C). Cool completely on a wire rack.
Important Information
Nutrition Facts (Per Serving)
It is important to consider this information as approximate and not to use it as definitive health advice.
Allergy Information
Please check ingredients for potential allergens and consult a health professional if in doubt.