Brookie Protein Balls-Easy No-Bake Treat
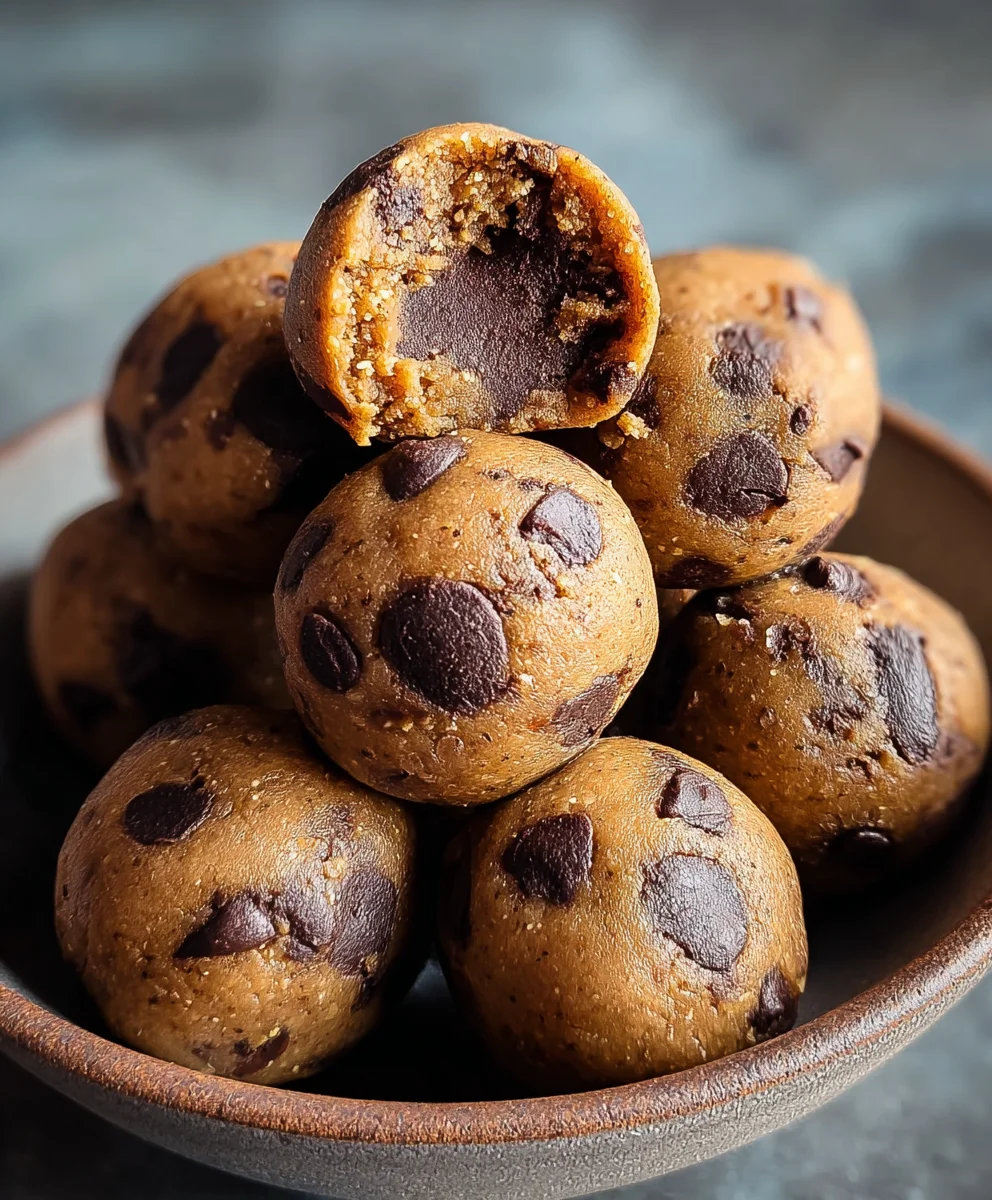
Brookie Protein Balls are the ultimate guilt-free indulgence, blending the irresistible flavors of brownies and cookies into perfectly portable, nutrient-packed spheres. If you’ve ever found yourself torn between a fudgy brownie and a chewy cookie, or simply craved a satisfying snack that fuels your body without derailing your goals, then these brookie protein balls are about to become your new obsession. They’re incredibly easy to whip up, requiring no baking and minimal fuss, making them ideal for busy weekdays or pre- or post-workout fuel. What truly makes these brookie protein balls special is their clever combination of textures and tastes – a rich, chocolatey base swirled with delightful cookie-dough-esque crum extractbles, all packed with protein to keep you feeling full and energized.
Why You’ll Love Them:
These delightful treats satisfy your sweet tooth while providing sustained energy, making them perfect for anyone looking for a healthier alternative to traditional desserts. They’re a fantastic way to sneak in extra protein, and the customizable nature means you can adapt them to your favorite flavor profiles. The compact size makes them ideal for on-the-go snacking, lunchbox additions, or a thoughtful homemade gift.
What Makes Them Unique:
The magic of these brookie protein balls lies in their harmonious fusion of two beloved desserts. We’ve managed to capture the essence of both a decadent brownie and a classic cookie in a single, bite-sized package. The interplay of dark chocolate richness and sweet, buttery cookie notes, all while delivering a powerful protein punch, is what sets them apart. Get ready to experience a flavor explosion that’s both deeply satisfying and wonderfully wholesome.
Ingredients:
- 1 cup drippy cashew butter
- 1/2 cup vanilla pea protein
- 1/4 cup maple syrup
- 2 tablespoons milk of choice (almond, oat, or dairy all work wonderfully)
- 1 teaspoon vanilla extract
- 1/4 cup chocolate chips (dairy-free if preferred)
- 3 tablespoons cacao powder
Preparing Your Brookie Protein Balls
Step 1: Combining the Wet Ingredients and Cashew Butter
Begin extract by gathering all your ingredients and a medium-sized mixing bowl. The foundation of these delicious brookie protein balls is the cashew butter. Ensure your cashew butter is “drippy,” meaning it’s smooth and pourable. If your cashew butter has separated or is quite firm, a quick stir with a fork or spoon will help loosen it up. Add the entire cup of drippy cashew butter to your mixing bowl. Next, pour in the maple syrup. This natural sweetener not only adds a lovely caramel-like flavor but also helps bind our ingredients together. Finally, add the vanilla extract. The pure vanilla extract will enhance the overall sweetness and add a comforting aroma to your protein balls. Using a sturdy spoon or a spatula, vigorously mix these three ingredients together until they form a smooth, homogenous paste. It’s important to get a good blend here because this creamy base will carry all the other flavors and textures.
Step 2: Incorporating the Dry Powders
Once your wet ingredients are well combined and smooth, it’s time to introduce the dry components. Carefully measure out the vanilla pea protein and the cacao powder. The vanilla pea protein will provide the bulk of the protein content, making these balls a fantastic post-workout snack or a healthy energy boost. The cacao powder, on the other hand, will contribute a rich, deep chocolate flavor that perfectly complements the “brookie” (brownie and cookie) essence we’re aiming for. Add both the pea protein and the cacao powder directly into the bowl with the cashew butter mixture. Now, gently fold these powders into the wet ingredients. You can switch back to your spoon or spatula for this. The mixture will start to thicken considerably as the powders absorb the moisture. Continue mixing until there are no visible streaks of dry powder. It should look like a thick, brownie-like batter. Don’t be alarmed if it seems a bit stiff; that’s exactly what we want.
Step 3: Achieving the Perfect Dough Consistency
At this stage, the dough might feel a little firm, which is a good sign. However, to achieve the ideal texture for rolling into balls, we need to add a touch of liquid. Measure out your milk of choice. Whether you opt for almond milk, oat milk, or even traditional dairy milk, the purpose here is to add just enough moisture to make the dough pliable without making it sticky. Start by adding just one tablespoon of milk. Gently fold it into the dough. Observe the consistency. If it still feels too dry and crum extractbly, add the second tablespoon of milk. Continue to mix until the dough comes together and is no longer sticking excessively to the sides of the bowl or your utensils. The ideal consistency is one that you can easily handle and shape without it falling apart or becoming unmanageably sticky. This might take a minute or two of gentle kneading within the bowl.
Step 4: Folding in the Chocolate Chips and Chilling
Now for the most exciting part: the chocolate chips! These little pockets of melted chocolate will add delightful bursts of flavor and texture, truly embodying the “brookie” experience. Gently fold in the 1/4 cup of chocolate chips into the dough. Try to distribute them evenly throughout the mixture. Be careful not to overmix at this point, as we want to keep the integrity of the chips. Once the chocolate chips are incorporated, cover the bowl tightly with plastic wrap or a lid. Place the bowl in the refrigerator for at least 30 minutes. This chilling period is crucial. It allows the flavors to meld together, the fats to firm up, and most importantly, it makes the dough much easier to handle and roll into neat, uniform balls. Without this chilling step, the dough would be too soft and sticky to work with effectively.
Step 5: Rolling and Enjoying Your Brookie Protein Balls
After the chilling period, remove the bowl from the refrigerator. The dough should now be firm and much less sticky. Prepare your hands by lightly wetting them with water or a touch of oil if you find them sticking slightly, though the chilling should have minimized this. Scoop out small portions of the dough, approximately one tablespoon at a time. Roll each portion between your palms to form a smooth, round ball. Aim for consistency in size so they all bake or set uniformly if you choose to bake them (though they are delicious as no-bake). Place the rolled balls onto a plate or baking sheet lined with parchment paper. Continue this process until all the dough is used up. You should yield approximately 12-15 brookie protein balls. These are now ready to be enjoyed immediately. For optimal flavor and texture, store any leftover brookie protein balls in an airtight container in the refrigerator for up to a week. They are the perfect grab-and-go snack!
Conclusion:
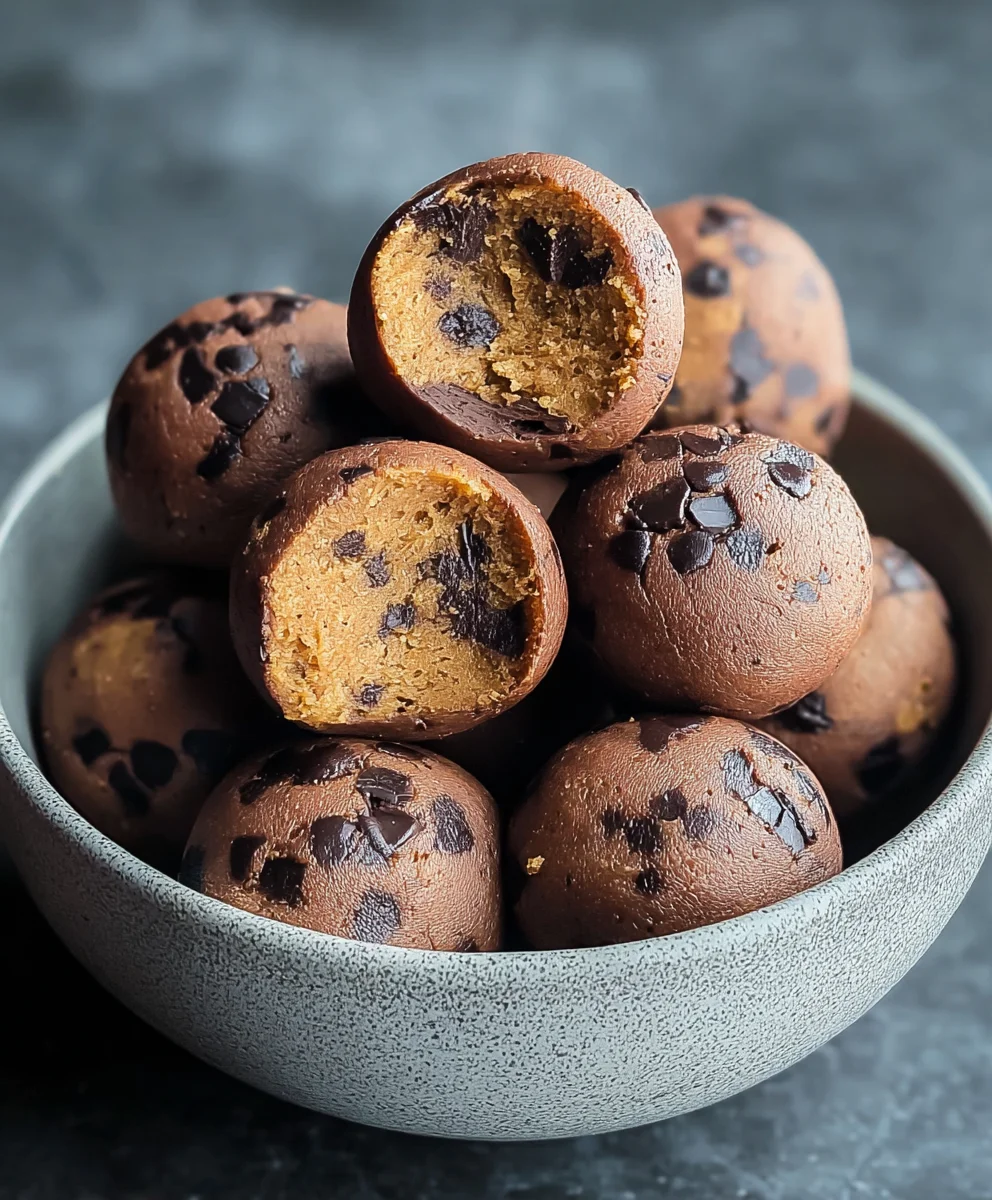
And there you have it – your very own batch of delicious and guilt-free Brookie Protein Balls! We’ve walked through the simple steps to create these delightful treats, proving that you don’t need to sacrifice flavor for fitness. These are perfect for a quick breakfast on the go, a satisfying post-workout snack, or even a healthy dessert to curb those sweet cravings. I hope you enjoyed making and tasting these as much as I did!
For serving suggestions, I love to pop a couple of these into my lunchbox or keep a container in the fridge for easy access throughout the day. They pair wonderfully with a cup of herbal tea or a glass of cold milk. When it comes to variations, feel free to experiment! You could add a sprinkle of chia seeds for extra omega-3s, a dash of cinnamon for warmth, or even some mini dark chocolate chips for an extra indulgence. Don’t be afraid to get creative and make these Brookie Protein Balls your own! I encourage you to try this recipe and share your experiences.
Frequently Asked Questions:
Can I make these Brookie Protein Balls ahead of time?
Absolutely! These Brookie Protein Balls are fantastic for meal prepping. You can store them in an airtight container in the refrigerator for up to a week. They can also be frozen for longer storage, though the texture might be slightly softer upon thawing.
What if I don’t have protein powder? Can I substitute it?
While protein powder is key for the “protein” aspect, you can try substituting it with other finely ground ingredients like almond flour or oat flour for a different texture and nutritional profile. However, keep in mind that the protein content will be lower, and you might need to adjust the liquid slightly to achieve the right consistency for your Brookie Protein Balls.
Brookie Protein Balls
Easy no-bake treat combining the deliciousness of brownies and cookies with a protein boost.
Ingredients
-
1 cup drippy cashew butter
-
1/2 cup vanilla pea protein
-
1/4 cup maple syrup
-
2 tablespoons milk of choice (almond, oat, or dairy)
-
1 teaspoon vanilla extract
-
1/4 cup chocolate chips (dairy-free if preferred)
-
3 tablespoons cacao powder
Instructions
-
Step 1
In a medium bowl, combine drippy cashew butter, maple syrup, and vanilla extract. Mix vigorously until a smooth, homogenous paste forms. -
Step 2
Add vanilla pea protein and cacao powder to the wet ingredients. Gently fold until no dry streaks of powder remain, creating a thick, brownie-like batter. -
Step 3
Add one tablespoon of milk of choice to the dough. Gently fold it in. If the dough is still too dry and crumbly, add the second tablespoon of milk until the dough is pliable and not excessively sticky. -
Step 4
Gently fold in the chocolate chips, distributing them evenly. Cover the bowl tightly and refrigerate for at least 30 minutes to allow flavors to meld and the dough to firm up. -
Step 5
Scoop out tablespoon-sized portions of the chilled dough. Roll each portion between your palms to form smooth, round balls. Place the rolled balls onto a plate or parchment-lined baking sheet. -
Step 6
Enjoy immediately or store in an airtight container in the refrigerator for up to a week.
Important Information
Nutrition Facts (Per Serving)
It is important to consider this information as approximate and not to use it as definitive health advice.
Allergy Information
Please check ingredients for potential allergens and consult a health professional if in doubt.