Best Beef Slider Recipes Crowd Pleasers
50 Best Slider Recipes! That’s right, we’re diving headfirst into a world of miniature marvels, a collection designed to ignite your culinary creativity and guarantee your next gathering is a roaring success. Sliders aren’t just small burgers; they’re bite-sized expressions of pure joy, offering a delightful way to sample a variety of flavors without overwhelming your palate. What’s not to love about them? They’re incredibly versatile, perfect for game days, casual parties, or even a fun weeknight dinner. Everyone adores sliders because they allow for endless customization, from classic beef patties to inventive vegetarian options, and even sweet treats. This isn’t just a list; it’s your ultimate guide to unlocking the potential of these small wonders, ensuring your kitchen becomes the hub of deliciousness with these 50 best slider recipes.
Ingredients:
- 1.5 pounds ground beef (80/20 blend is ideal for flavor and juiciness)
- 1/2 cup finely chopped yellow onion
- 1/4 cup plain breadcrum extractbs
- 1 large egg
- 1 tablespoon Worcestershire sauce
- 1 teaspoon garlic powder
- 1/2 teaspoon onion powder
- 1/2 teaspoon salt
- 1/4 teaspoon black pepper
- 24 slider buns
- Optional toppings: sliced cheddar cheese, lettuce leaves, tomato slices, pickles, ketchup, mustard, mayonnaise
Preparing the Sliders
Forming the Patties
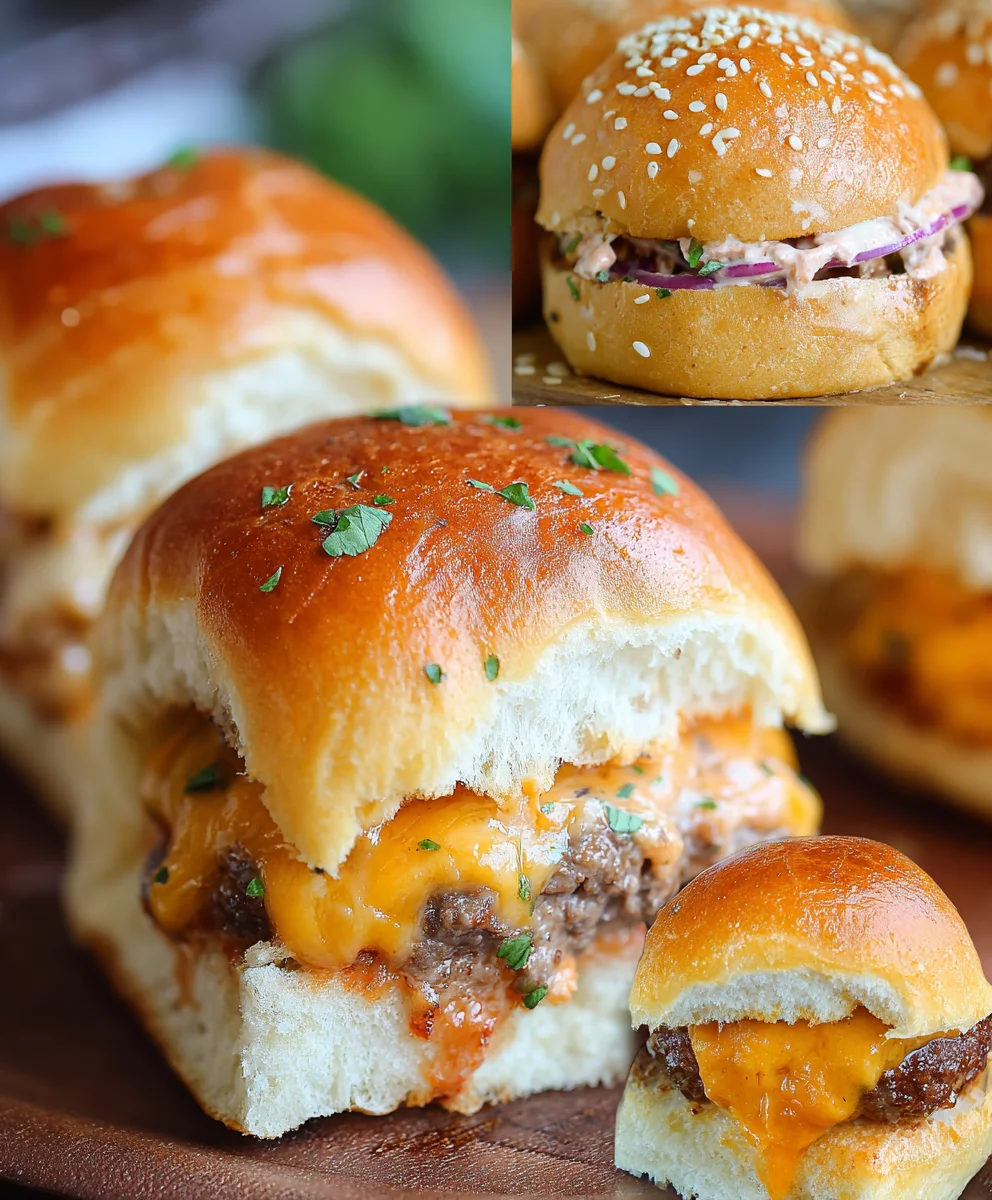
Let’s get started by preparing our delicious slider patties. In a large mixing bowl, combine the 1.5 pounds of ground beef. It’s important to use a good quality ground beef, and an 80/20 blend typically offers the best balance of flavor and moisture, preventing the sliders from becoming dry. Next, add the 1/2 cup of finely chopped yellow onion. Chopping the onion very finely ensures that it distributes evenly throughout the meat and softens beautifully as the sliders cook, contributing a subtle sweetness and savory depth. Then, incorporate the 1/4 cup of plairum extractreadcrumbs. These act as a binder, helping to hold the patties together without making them drum extracte. The breadcrumbs also absorb some of the meat’s juices, contributing to a tender final product. Now, crack in the large egg. The egg also serves as a binder and adds richness to the mixture. For that classic umami flavor, stir in 1 tablespoon of Worcestershire sauce. This is a secret weapon for many great burger recipes, adding a complex, savory, and slightly tangy note. Next, let’s layer in the seasonings: 1 teaspoon of garlic powder for a pungent kick, 1/2 teaspoon of onion powder to complement the fresh onion, 1/2 teaspoon of salt to enhance all the flavors, and finally, 1/4 teaspoon of black pepper for a hint of spice. Now comes the crucial part: mixing. Gently combine all the ingredients with your hands. It’s really important not to overmix the meat. Overmixing can develop rum extract gluten in the breadcrumbs too much and toughen the meat, resulting in chewy sliders instead of tender ones. Aim to mix just until everything is evenly distributed. Once mixed, divide the meat mixture into 24 equal portions. This will give you perfectly sized sliders. Roll each portion into a ball, then gently flatten each ball into a patty, about 1/2 inch thick. Try to make them slightly larger than your slider buns, as they will shrink a little as they cook. You can place these formed patties on a plate or baking sheet lined with parchment paper. If you have time, chilling the patties in the refrigerator for about 30 minutes before cooking can help them hold their shape even better during the cooking process.
Cooking the Sliders
Grilling or Pan-Frying the Patties
Now that our patties are prepped and ready, it’s time to cook them to perfection. You have a couple of excellent options for cooking: grilling or pan-frying. For grilling, preheat your grill to medium-high heat. If you’re pan-frying, heat a large skillet or griddle over medium-high heat. Add a tablespoon of oil or butter to the skillet if you’re not using a non-stick surface. Carefully place the slider patties onto the hot grill or skillet, ensuring not to overcrowd the cooking surface. You want to give them enough space so they sear properly and don’t steam. Cook the patties for about 2-3 minutes per side for medium-rare, or longer depending on your desired level of doneness. You’ll notice they develop a beautiful brown crust. For those who want cheese on their sliders, now is the time to add it. Place a slice of cheddar cheese on top of each patty during the last minute of cooking. The residual heat will melt the cheese beautifully, creating that irresistible gooey layer. If you’re grilling, you can close the lid briefly to help the cheese melt evenly.
Assembling the Sliders
Toasting Buns and Building Your Masterpiece
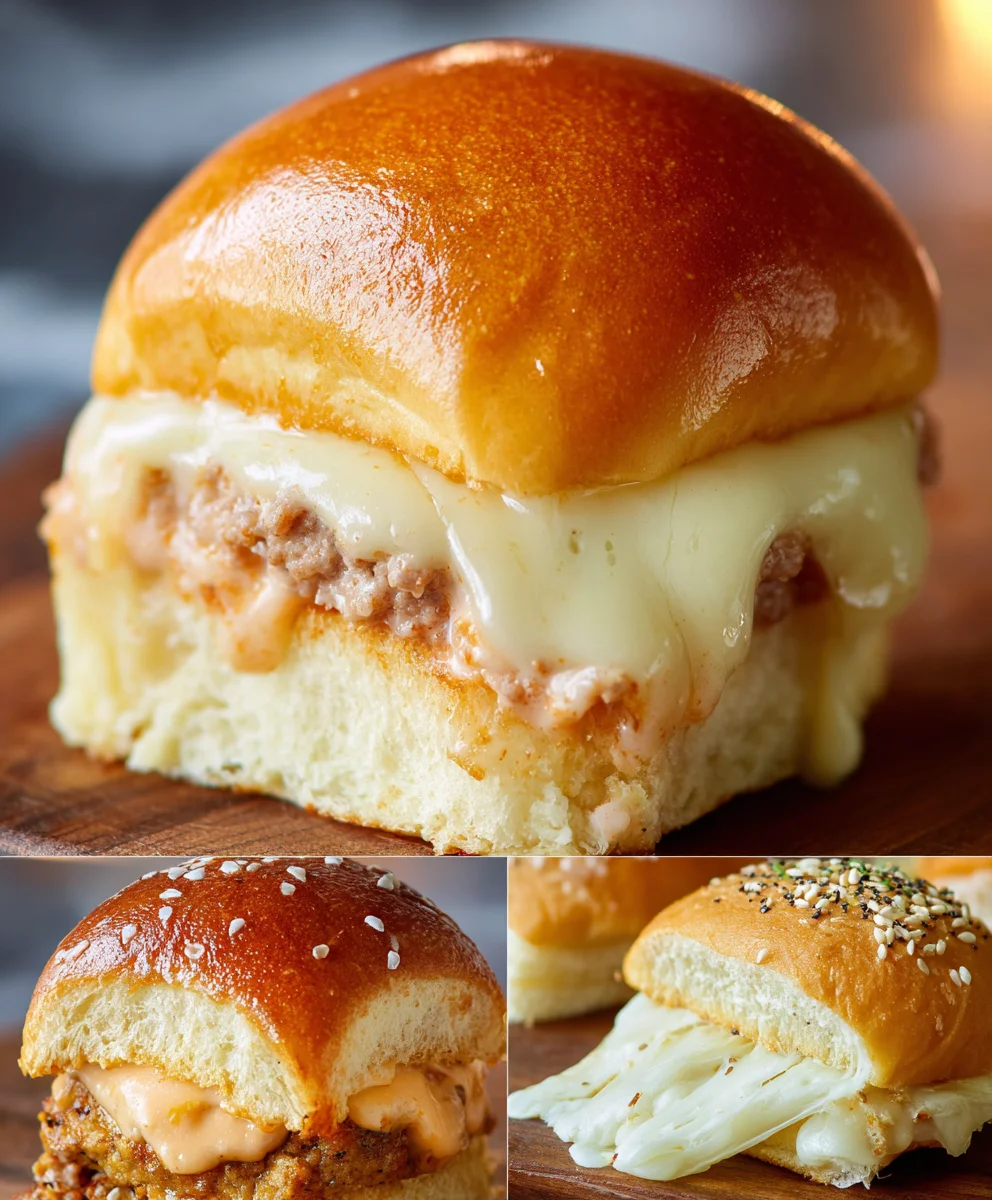
While the patties are finishing up, it’s time to get our slider buns ready. This step often gets overlooked, but toasting your slider buns makes a significant difference in texture and prevents them from becoming soggy. You can toast them directly on the grill for a minute or two, cut-side down, until lightly golden. Alternatively, you can lightly butter the cut sides and toast them in a skillet or under the broiler until golden brown. Keep a close eye on them as they toast quickly. Once the patties are cooked and the cheese is melted, remove them from the heat and let them rest for just a minute. This allows the juices to redistribute, ensuring a more flavorful and moist slider. Now, let’s assemble these beauties! Take your toasted slider buns. Spread your favorite condiments on the bottom halves of the buns – perhaps some mayonnaise for creaminess or ketchup and mustard for classic tang. Place a cooked slider patty on top of the condiment. If you’re adding extra toppings, layer them on now. Fresh crisp lettuce leaves, juicy tomato slices, and crunchy pickles are fantastic additions that add layers of flavor and texture. Top with the other half of the toasted bun, and there you have it – a perfect slider ready to be devoured!
Serving Suggestions
Enjoying Your Homemade Sliders
These sliders are incredibly versatile and perfect for any occasion, from game day parties to quick weeknight meals. Serve them immediately while they are warm and the cheese is still melty. They pair wonderfully with a side of crispy french fries, onion rings, or a fresh green salad. For a party setting, arrange them on a platter for easy grabbing. You can even set up a “slider bar” with all the optional toppings so your guests can customize their own creations. The key to enjoying these sliders is to savor each bite, appreciating the tender beef, the soft toasted bun, and the burst of flavors from your chosen toppings.
Conclusion:
We hope you’ve enjoyed this deep dive into crafting the perfect 50 Best Slider Recipes! As you can see, sliders are incredibly versatile, offering a world of flavor possibilities for any occasion, from backyard barbecues to elegant parties. The beauty of these mini delights lies in their adaptability. Don’t be afraid to experiment with different protein bases, cheeses, sauces, and toppings to create your own signature slider masterpieces.
For serving, consider a vibrant array of side dishes like crispy sweet potato fries, a refreshing coleslaw, or a colorful caprese salad. These 50 Best Slider Recipes are also fantastic as part of a larger appetizer spread. Remember, the goal is to have fun in the kitchen and share delicious food with loved ones. We encourage you to try out a few of these recipes and see which ones become your new favorites!
Frequently Asked Questions:
Can I make the slider patties ahead of time?
Absolutely! You can form the slider patties and store them in the refrigerator for up to 24 hours. For longer storage, freeze them individually separated by parchment paper and then transfer them to a freezer-safe bag. Thaw them in the refrigerator overnight before cooking.
What are some good vegetarian or vegan slider options from the 50 Best Slider Recipes?
Many of the concepts can be adapted! For vegetarian options, consider mushroom and Swiss cheese sliders or black bean and corn sliders. For vegan sliders, explore options like lentil patties, grilled portobello mushroom sliders, or even store-bought vegan burger patties. You’ll need to ensure your buns and any sauces are also vegan-friendly.
Best Beef Slider Recipes Crowd Pleasers
Delicious and juicy beef sliders that are perfect for any gathering, offering a balance of flavor and tenderness with customizable toppings.
Ingredients
-
1.5 pounds ground beef
-
1/2 cup finely chopped yellow onion
-
1/4 cup plain breadcrumbs
-
1 large egg
-
1 tablespoon Worcestershire sauce
-
1 teaspoon garlic powder
-
1/2 teaspoon onion powder
-
1/2 teaspoon salt
-
1/4 teaspoon black pepper
-
24 slider buns
-
Sliced cheddar cheese
-
Lettuce leaves
-
Tomato slices
-
Pickles
-
Ketchup
-
Mustard
-
Mayonnaise
Instructions
-
Step 1
In a large mixing bowl, combine ground beef, finely chopped yellow onion, breadcrumbs, egg, Worcestershire sauce, garlic powder, onion powder, salt, and black pepper. Gently mix until just combined, being careful not to overmix. -
Step 2
Divide the meat mixture into 24 equal portions. Roll each portion into a ball, then flatten into patties about 1/2 inch thick, slightly larger than the slider buns. -
Step 3
Preheat your grill to medium-high heat or heat a large skillet over medium-high heat with a tablespoon of oil or butter. Cook the slider patties for about 2-3 minutes per side, or until desired doneness. Add cheddar cheese slices during the last minute of cooking to melt. -
Step 4
While patties are cooking, lightly toast the cut sides of the slider buns on the grill, in a skillet, or under the broiler until golden brown. -
Step 5
Remove patties from heat and let rest briefly. Spread condiments on the bottom halves of the toasted buns, place a cooked patty on top, and add your desired toppings such as lettuce, tomato, and pickles. -
Step 6
Top with the other half of the bun and serve immediately.
Important Information
Nutrition Facts (Per Serving)
It is important to consider this information as approximate and not to use it as definitive health advice.
Allergy Information
Please check ingredients for potential allergens and consult a health professional if in doubt.