Easy St. Patrick’s Day Cookies – Festive & Fun Recipe
Easy St. Patrick’s Day Cookies are the perfect way to add a touch of festive cheer to your celebration without any fuss! As March rolls around, I always find myself searching for simple yet delightful treats that capture the spirit of the holiday. These aren’t just any cookies; they’re a little burst of green joy that everyone, from seasoned bakers to kitchen novices, can whip up in no time. People absolutely adore these cookies because they’re incredibly forgiving, wonderfully customizable, and guaranteed to bring smiles to faces. What makes these Easy St. Patrick’s Day Cookies truly special is their ability to transform ordinary ingredients into something magical. With just a few simple steps, you’ll have a batch of charming, delicious cookies ready to be shared. Get ready to embrace the luck of the Irish with these delightful treats!
Why You’ll Love Them
Simple Ingredients, Big Flavor
You don’t need a pot of gold to make these delicious Easy St. Patrick’s Day Cookies. They are crafted with pantry staples, making them accessible for everyone. We’ll focus on flavor and fun, ensuring your baking experience is as enjoyable as the cookies themselves. These are the kind of treats that become instant family favorites, perfect for classroom parties or simply enjoying a cozy afternoon.
Easy St. Patrick’s Day Cookies
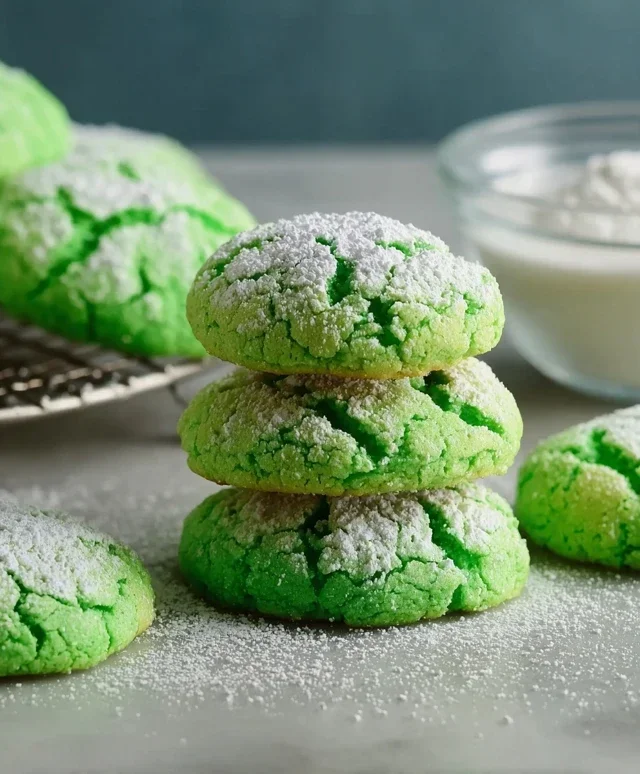
Looking for a festive and ridiculously simple way to celebrate St. Patrick’s Day? You’ve come to the right place! These easy St. Patrick’s Day cookies are the perfect blend of delicious, fun, and downright effortless. Forget complicated doughs and hours in the kitchen. We’re harnessing the magic of a simple cake mix to create delightful, bright green treats that will have everyone feeling lucky. They’re soft, slightly chewy, and have just the right amount of sweetness, making them an instant crowd-pleaser. Whether you’re hosting a St. Paddy’s party, sending a treat to school, or just want to add a touch of emerald cheer to your day, these cookies are your golden ticket.
Ingredients:
Cooking Instructions
Getting these festive cookies ready is a breeze. We’ll break it down into simple steps to ensure perfect results every time.
Mixing the Dough
1. First things first, preheat your oven to 350°F (175°C). This is crucial for ensuring your cookies bake evenly and achieve that lovely soft texture. While the oven heats up, you can line your baking sheets with parchment paper. This not only makes cleanup a cinch but also prevents your cookies from sticking. Now, let’s get down to the dough. In a large mixing bowl, combine the entire box of white cake mix. Don’t worry if it seems like a lot of dry ingredients; this is the base of our super-easy cookies.
2. Next, add the wet ingredients. Crack in your two large eggs and pour in the 1/3 cup of vegetable oil. The oil contributes to the tenderness and moisture of the cookies, ensuring they don’t turn out dry or crum extractbly. At this stage, you might be tempted to mix everything vigorously. However, for these cake mix cookies, a gentle hand is best. We want to combine the ingredients until they’re just incorporated. Overmixing can lead to tougher cookies, and we’re aiming for soft and delightful!
3. Now for the fun, festive part: the color! Add the 1/4 teaspoon of Kelly green gel food coloring to the batter. Gel food coloring is your best friend here because it provides a vibrant, concentrated color without adding excess liquid, which could alter the cookie’s texture. Start with 1/4 teaspoon, and if you desire a deeper, more intense green, you can add a tiny bit more, just a drop at a time, until you reach your desired shade. Gently mix the food coloring into the batter until the color is uniform throughout. You should have a beautiful, vibrant green dough that screams St. Patrick’s Day!
Shaping and Baking
4. Once your dough is a lovely shade of green, it’s time to form your cookies. We’re going for a simple drop cookie method. You can use a tablespoon to scoop rounded portions of the dough and place them onto your prepared baking sheets. Leave about 2 inches of space between each cookie because they will spread a bit as they bake. For an extra touch of charm, and to help them bake more evenly, you can gently flatten each cookie slightly with the bottom of a glass or your fingertips. This also creates a nice surface for the sugar coating.
5. Now it’s time to bake! Place your baking sheets into the preheated oven and bake for 8 to 10 minutes. The exact baking time will depend on your oven, so keep an eye on them. You’re looking for the edges to be set and lightly golden, but the centers should still appear slightly soft. We don’t want to overbake these! Overbaked cake mix cookies can become dry and hard. As soon as they look done, carefully remove the baking sheets from the oven. Let the cookies cool on the baking sheets for about 5 minutes. This allows them to firm up enough to be moved without falling apart.
Finishing Touches
6. While your cookies are cooling on the baking sheets, prepare the simple sugar coating. In a small bowl, whisk together the 3 tablespoons of granulated sugar and the 6 tablespoons of powdered sugar. This creates a delicate, sweet coating that adds a lovely finish and a little extra crunch. Once the cookies have cooled on the baking sheets for those 5 minutes, carefully transfer them to a wire rack to cool completely. This is essential before you attempt to coat them with sugar. Warm cookies will melt the sugar coating, creating a sticky mess instead of a pretty dusting. Once they are completely cool to the touch, you can gently roll each cookie in the sugar mixture or sprinkle it generously over the top. For an extra festive touch, you could even add a sprinkle of edible green glitter or small green candies to some of them before they set! These cookies are best enjoyed fresh, but they will keep in an airtight container at room temperature for up to 3 days. Happy St. Patrick’s Day!
Conclusion:
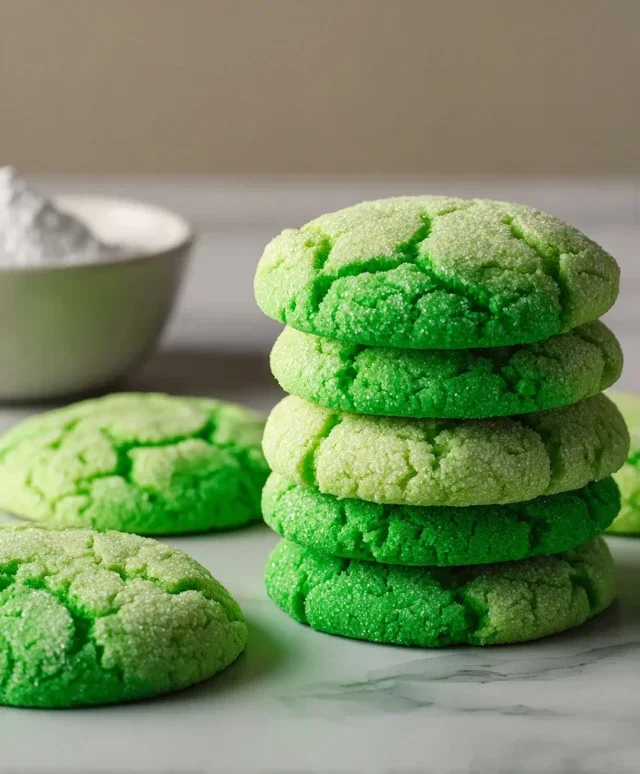
And there you have it! These Easy St. Patrick’s Day Cookies are truly a winner for any celebration. Their simple ingredients, straightforward steps, and delightful festive appearance make them perfect for bakers of all skill levels. Whether you’re looking for a fun activity to do with kids or a charming treat to bring to a potluck, these cookies are guaranteed to impress with minimal fuss. They’re a fantastic way to bring a touch of green cheer to your St. Patrick’s Day festivities without spending hours in the kitchen.
These delightful treats are incredibly versatile. Serve them alongside a glass of milk for a classic pairing, or get creative with your serving suggestions! They make fantastic additions to a St. Patrick’s Day dessert table, can be packaged in cellophane bags as sweet party favors, or even used to decorate a sbeef hamrock-themed cake. For variations, feel free to experiment with different food coloring shades of green, or even add a touch of edible glitter for extra sparkle. You could also swap out the vanilla extract for a hint of peppermint for a refreshing twist!
I highly encourage you to give these Easy St. Patrick’s Day Cookies a try. They are a testament to how simple, homemade treats can bring so much joy. Don’t be afraid to get creative and make them your own. Happy baking and Happy St. Patrick’s Day!
Frequently Asked Questions:
Can I make these cookies ahead of time?
Absolutely! These cookies can be baked a day or two in advance and stored in an airtight container at room temperature. If you’re decorating them with frosting, ensure the frosting is completely set before stacking or storing.
What if I don’t have cookie cutters?
No worries! You can simply roll the dough into small balls and flatten them slightly, or even roll out the dough and cut it into squares or rectangles with a knife. The flavor will be just as delicious!
Are there any nut-free options?
Yes, this recipe is naturally nut-free as written, making it a great option for those with nut allergies. Always double-check your ingredient labels to ensure they are free from any cross-contamination.
Easy St. Patrick’s Day Cookies
Simple and festive green cookies perfect for St. Patrick’s Day celebrations.
Ingredients
-
1 box (15.25 oz white cake mix (about 3 cups))
-
2 large eggs
-
1/3 cup vegetable oil
-
1/4 teaspoon Kelly green gel food coloring
-
3 tablespoons granulated sugar
-
6 tablespoons powdered sugar
Instructions
-
Step 1
Preheat oven to 350°F (175°C) and line baking sheets with parchment paper. -
Step 2
In a large bowl, combine the white cake mix, eggs, and vegetable oil. -
Step 3
Add the Kelly green gel food coloring and mix until the dough is evenly colored. -
Step 4
Drop rounded tablespoons of dough onto the prepared baking sheets. -
Step 5
In a small bowl, combine the granulated sugar and powdered sugar for rolling. -
Step 6
Roll each cookie dough ball in the sugar mixture until coated. -
Step 7
Bake for 8-10 minutes, or until the edges are lightly golden and the centers are set. -
Step 8
Let the cookies cool on the baking sheets for a few minutes before transferring to a wire rack to cool completely.
Important Information
Nutrition Facts (Per Serving)
It is important to consider this information as approximate and not to use it as definitive health advice.
Allergy Information
Please check ingredients for potential allergens and consult a health professional if in doubt.