The Best White Bread From Scratch-Easy Homemade Recipe
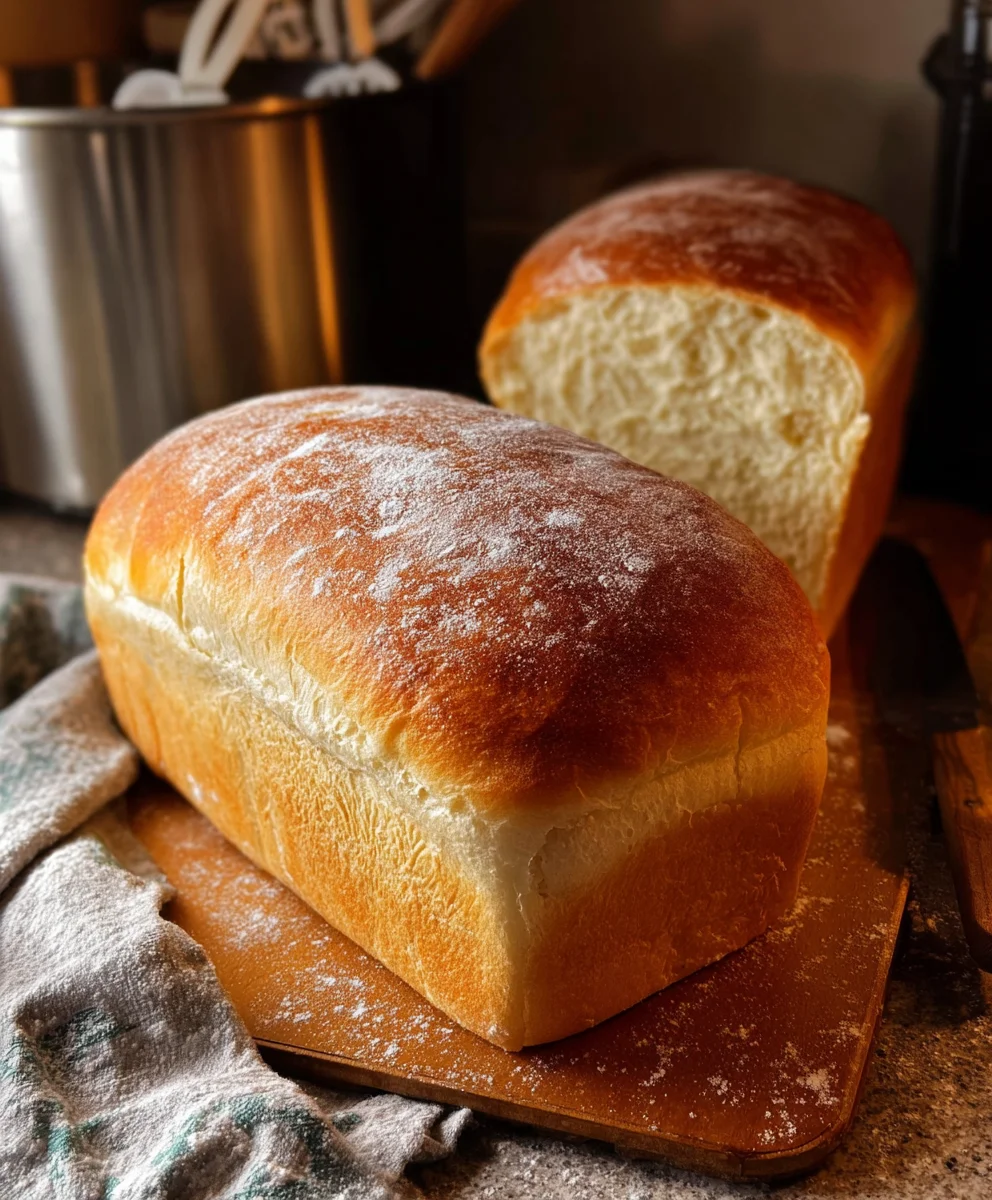
The Best White Bread from Scratch is more than just a recipe; it’s an invitation to rediscover the simple magic of homemade baking. There’s an undeniable comfort and satisfaction that comes from pulling a golden-brown, perfectly risen loaf from your own oven. For generations, the aroma of freshly baked bread has filled kitchens, signaling warmth, nourishment, and love. What is it about this seemingly simple white bread that captures our hearts and taste buds? It’s the pillowy soft interior, the subtly sweet, yeasty flavor, and that delightful, crisp crust that yields with a satisfying crackle. This isn’t just any bread; it’s a cornerstone of countless meals, from humble toast to elegant sandwiches, and mastering the best white bread from scratch unlocks a world of culinary possibilities. We’ll guide you through every step, ensuring your first attempt, or your hundredth, results in a loaf that’s truly exceptional.
Why We Love This Recipe:
People adore this recipe because it demystifies the process of creating perfect white bread. It’s designed for home bakers of all skill levels, promising a reliable outcome that’s far superior to store-bought alternatives. Imagin extracte the pure joy of slicing into a warm loaf, knowing you created it with your own hands. The texture is consistently light and airy, with just the right amount of chew, and the flavor is a pure, unadulterated celebration of wheat and yeast. This is the kind of bread that makes breakfast special, elevates your lunch, and is the perfect accompaniment to any dinner.
What Makes it Special:
What sets the best white bread from scratch apart is the careful balance of simple, high-quality ingredients and a straightforward technique. We focus on developing a beautiful gluten structure that leads to that signature soft crum extractb, while also ensuring a fantastic crust that’s both tender and satisfyingly chewy. It’s a recipe that respects tradition but is refined for modern kitchens, making it approachable and rewarding. This isn’t about complicated steps or obscure ingredients; it’s about patience, a little bit of kneading, and the magic that happens when simple elements combine to create something truly extraordinary.
Ingredients:
- 2 cups warm water (around 105-115°F or 40-46°C – not too hot, or it will kill the yeast!)
- 1/4 cup granulated sugar
- 5 cups all-purpose flour, plus more for dusting
- 2 teaspoons active dry yeast
- 2 teaspoons salt
- 3 tablespoons softened unsalted butter, plus extra for greasing
Preparing the Dough
The journey to The Best White Bread from Scratch begin extracts with activating your yeast gin extract bringing together the foundational elements of our dough. This stage is crucial for developing a beautifully soft and airy crum extractb.
First, in a large mixing bowl (or the bowl of your stand mixer fitted with the dough hook), combine the 2 cups of warm water and the 1/4 cup of granulated sugar. Give this a gentle stir to hgin extract the sugar begin to dissolve. Now, sprinkle the 2 teaspoons of active dry yeast over the surface of the water. It’s important not to stir it in aggressively at this point; just let it sit on top. You’ll want to let this mixture stand, undisturbed, for about 5 to 10 minutes. What you’re looking for is a foamy, bubbly layer to form on top. This indicates that your yeast is alive and ready to work its magic, leavening our bread. If you don’t see any foam, your yeast might be old or the water might have been too hot or too cold, and you’ll need to start this step again with fresh yeast.
Once your yeast mixture is nice and foamy, it’s time to add the dry ingredients. To the same bowl, add the 5 cups of all-purpose flour and the 2 teaspoons of salt. If you’re using a stand mixer, start it on a low speed to just combine the ingredients. If you’re mixing by hand, use a sturdy spoon or spatula to gently incorporate the flour and salt into the wet ingredientsgin extracttil a shaggy dough begins to form. Don’t worry if it looks a bit messy at this stage; that’s perfectly normal.
Kneading the Dough
Now comes the satisfying part: kneading! This process develops the gluten in the flour, which is essential for the structure and texture of our white bread. If you’re using a stand mixer, increase the speed to medium-low and let the mixer knead the dough for about 7-10 minutes. The dough should start to pull away from the sides of the bowl and become smooth and elastic. If you’re kneading by hand, turn the shaggy dough out ongin extracta lightly floured surface. Begin to push the dough away from you with the heels of your hands, then fold it back towards you. Rotate the dough a quarter turn and repeat. Continue this rhythmic motion for about 10-15 minutes. You’ll know the dough is ready when it’s smooth, elastic, and springs back when gently poked. It should feel soft and slightly tacky, but not stick excessively to your hands. At this point, you’ll also incorporate the 3 tablespoons of softened unsalted butter. If you’re using a stand mixer, add the butter a tablespoon at a time while the mixer is running on low. Continue to knead until the butter is fully incorporated and the dough is smooth again. If kneading by hand, work the softened butter into the dough after it has become mostly smooth, ensuring it’s fully integrated before continuing the kneading process.
First Rise (Proofing)
Once your dough has been thoroughly kneaded and the butter is beautifully incorporated, it’s time for its first rise. Lightly grease a clean, large bowl with a little extra butter or cooking spray. This will prevent the dough from sticking as it expands. Place the kneaded dough into the prepared bowl, turning it once to coat the entire surface with the grease. Cover the bowl tightly with plastic wrap or a clean, damp kitchen towel. Find a warm, draft-free spot in your kitchen for the dough to rise. This could be in a slightly warm oven (turned off, of course!), on top of your refrigerator, or simply in a sunny spot. You’ll want to let the dough rise for about 1 to 1.5 hours, or until it has doubled in size. The exact time can vary depending on the temperature of your kitchen. You’ll be able to tell it’s ready when it looks noticeably puffy and has increased significantly in volume.
Shaping the Loaf
After the dough has had its satisfying first rise and is beautifully doubled in size, it’s time to prepare it for its final form. Gently punch down the dough in the center of the bowl to release the air that has been trapped inside. This deflates the dough and makes it easier to handle. Turn the dough out onto a lightly floured work surface. Now, gently shape it into your desired loaf. For a classic sandwich loaf, you’ll want to pat the dough into a rough rectangle. Then, starting from one of the short ends, tightly roll up the dough like a jelly roll, pressing gently to seal the seam as you go. Pinch the ends closed to prevent the loaf from spreading too much during baking. Place the shaped loaf, seam-side down, into a greased 9×5 inch loaf pan. If you prefer a round loaf, you can simply shape it into a ball and place it on a parchment-lined baking sheet.
Second Rise and Baking
With your loaf shaped and nestled in its pan, it’s time for its final rise, often called proofing. Cover the loaf pan loosely with plastic wrap or a clean kitchen towel. Again, find a warm spot for it to rise for another 30 to 60 minutes, or until the dough has risen about 1 inch above the rim of the pan. It should look plump and airy. While the loaf is doing its final rise, preheat your oven to 375°F (190°C). This ensures the oven is at the perfect temperature to bake our bread evenly and develop a beautiful crust. Once the loaf has completed its second rise, it’s ready for the oven. Carefully place the loaf pan on the center rack of the preheated oven. Bake for 30-35 minutes. You’ll know the bread is done when it’s golden brown on top and sounds hollow when tapped on the bottom. You can also use an instant-read thermometer; the internal temperature should reach around 190-200°F (88-93°C).
Cooling and Slicing
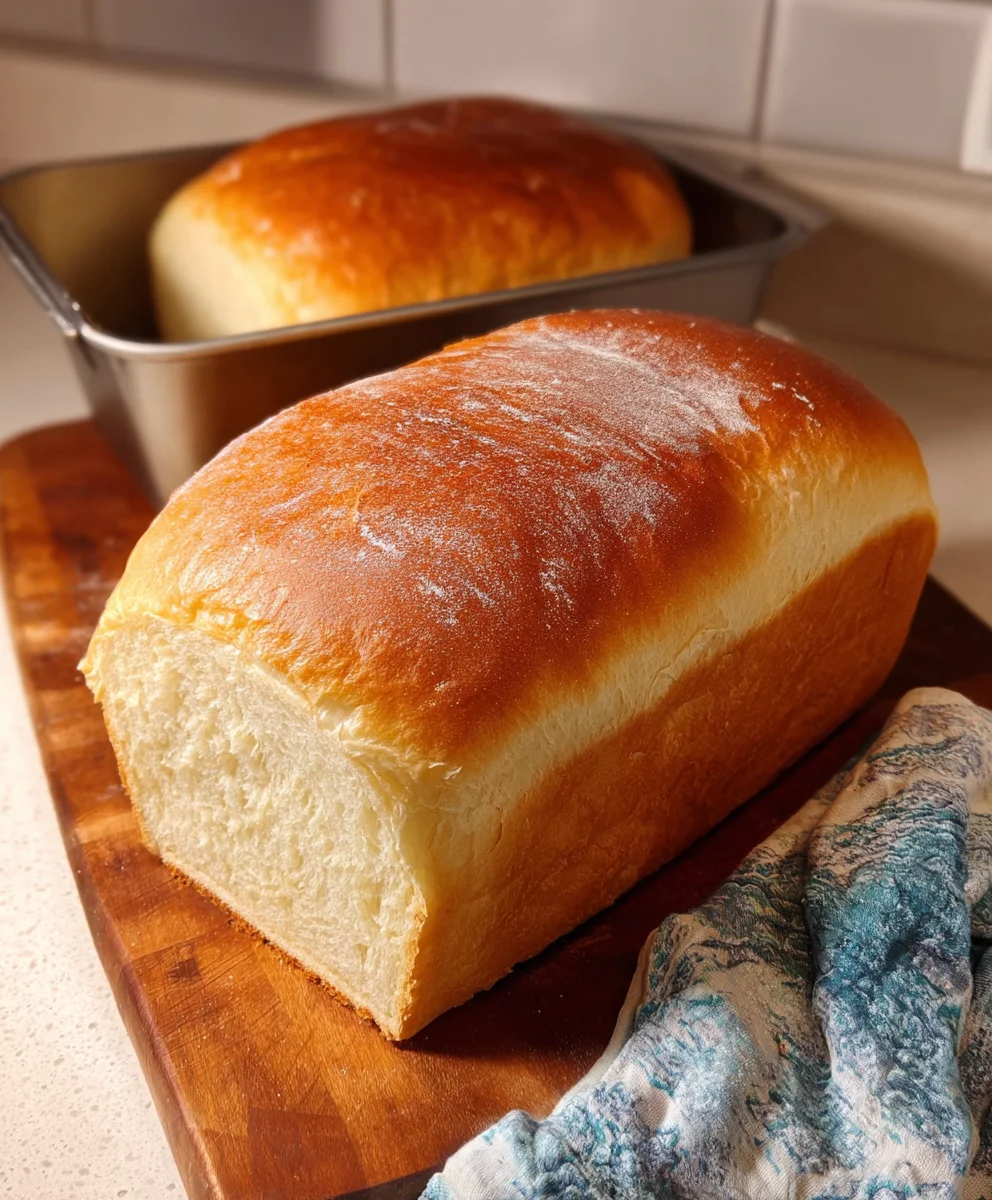
This is arguably the hardest part: waiting for the bread to cool! As soon as the bread comes out of the oven, immediately remove it from the loaf pan and place it on a wire cooling rack. This allows air to circulate around the entire loaf, preventing the bottom from becoming soggy. Resist the temptation to slice into it while it’s still piping hot. The internal structure of the bread needs time to set properly. If you cut it too soorum extractthe crumb can be gummy. Allow the loaf to cool for at least 30 minutes to an hour before slicing. Once cooled, use a serrated bread knife to achieve clean, even slices. Enjoy the incredible aroma and taste of your homemade white bread!
Conclusion:
We’ve journeyed through the rewarding process of creating The Best White Bread from Scratch, and the result is a testament to patience and simple ingredients. This recipe yields a wonderfully soft, slightly sweet loaf with a beautiful golden crust, perfect for elevating any meal. Don’t be intimidated by baking bread; it’s a truly satisfying experience.
Serving suggestions are abundant! Enjoy slices of The Best White Bread from Scratch toasted with butter and jam for breakfast, or use it to build the ultimate grilled cheese sandwich. It also makes a fantastic base for French toast or a hearty accompaniment to soups and stews. For variations, consider adding a touch of honey for extra sweetness, or incorporate dried herbs like rosemary or thyme into the dough for a savory twist. You could even try adding a sprinkle of sesame seeds or poppy seeds to the crust before baking. Embrace the joy of homemade goodness and share your delicious creation with loved ones.
Frequently Asked Questions:
Why is my bread not rising?
Several factors can affect bread rising. Ensure your yeast is fresh and active. Lukewarm liquid (around 105-115°F or 40-46°C) is crucial for activating yeast; too hot will kill it, and too cold won’t awaken it. Also, make sure your kneading process developed enough gluten, and that the dough had a warm, draft-free place to proof. Overproofing can also lead to a weak rise.
Can I use bread flour instead of all-purpose flour for The Best White Bread from Scratch?
Absolutely! Using bread flour will likely result in an even chewier texture and a better rise due to its higher protein content, which helps develop stronger gluten strands. The texture will be slightly different, but still delicious.
The Best White Bread From Scratch-Easy Homemade Recipe
An easy and straightforward recipe for making delicious, soft, and airy white bread from scratch at home.
Ingredients
-
2 cups warm water
-
1/4 cup granulated sugar
-
5 cups all-purpose flour, plus more for dusting
-
2 teaspoons active dry yeast
-
2 teaspoons salt
-
3 tablespoons softened unsalted butter, plus extra for greasing
Instructions
-
Step 1
In a large bowl, combine warm water and sugar. Sprinkle yeast over the surface and let stand for 5-10 minutes until foamy. -
Step 2
Add flour and salt to the yeast mixture. Mix until a shaggy dough forms. If using a stand mixer, knead on low speed. If by hand, stir with a spoon. -
Step 3
Knead the dough for 7-10 minutes in a stand mixer on medium-low, or for 10-15 minutes by hand on a lightly floured surface, until smooth and elastic. Incorporate softened butter gradually during kneading until fully integrated. -
Step 4
Place the kneaded dough in a greased bowl, cover, and let rise in a warm, draft-free spot for 1 to 1.5 hours, or until doubled in size. -
Step 5
Punch down the dough, shape into a loaf, and place seam-side down in a greased 9×5 inch loaf pan. Cover loosely and let rise for another 30-60 minutes, or until it has risen about 1 inch above the rim. -
Step 6
Preheat oven to 375°F (190°C). Bake for 30-35 minutes until golden brown and hollow-sounding when tapped. Internal temperature should be 190-200°F (88-93°C). -
Step 7
Immediately remove bread from the pan and cool on a wire rack for at least 30 minutes to an hour before slicing.
Important Information
Nutrition Facts (Per Serving)
It is important to consider this information as approximate and not to use it as definitive health advice.
Allergy Information
Please check ingredients for potential allergens and consult a health professional if in doubt.