Cheesecake Fruit Salad Roll Ups-Easy & Delicious
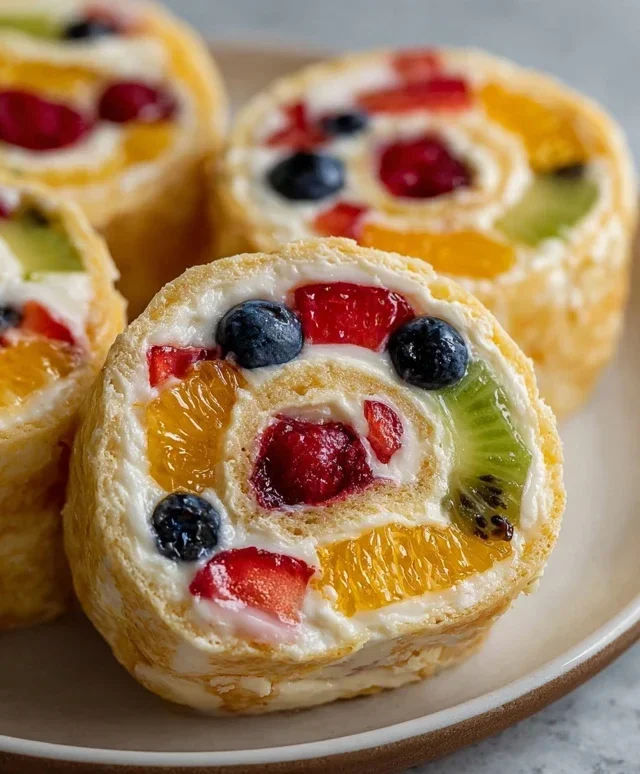
Cheesecake Fruit Salad Roll Ups are about to become your new obsession! Have you ever craved a dessert that’s both refreshingly fruity and decadently creamy, but also incredibly easy to make and serve? That’s precisely the magic of these delightful Cheesecake Fruit Salad Roll Ups. We all love a good cheesecake, right? The smooth, rich texture combined with a hint of tang is simply irresistible. And who doesn’t adore a vibrant, juicy fruit salad, bursting with natural sweetness and color? These roll ups take the best of both worlds and playfully combine them into a portable, bite-sized treat. What truly sets these Cheesecake Fruit Salad Roll Ups apart is their ingenious presentation – imagin extracte all your favorite fruits, tossed with a luscious cream cheese filling, all rolled up like a delightful sushi-inspired dessert. They’re perfect for parties, picnics, or just a special weekend indulgence that feels both impressive and effortless.
Cheesecake Fruit Salad Roll Ups
Are you looking for a fun, flavorful, and surprisingly easy dessert that’s perfect for parties, potlucks, or even just a special weeknight treat? Look no further than these delightful Cheesecake Fruit Salad Roll Ups! They’re a playful twist on classic fruit salad and cheesecake, combining creamy, fruity goodness with a hint of cinnamon-sugar crispiness. These roll-ups are visually appealing and incredibly delicious, sure to impress your guests and satisfy your sweet cravings. The beauty of this recipe lies in its adaptability; feel free to swap out fruits based on seasonality and your personal preferences. Let’s get started on creating this vibrant and tasty dessert!
Ingredients:
Preparing the Creamy Filling
The heart of our roll-ups is a luscious, creamy filling that balances the tang of cream cheese with the sweetness of whipped cream and a hint of vanilla. This part is straightforward and sets the stage for the fruit explosion.
First, in a medium-sized bowl, cream together the softened cream cheese and ½ cup of the unsalted butter until it’s light and fluffy. You want to ensure there are no lumps of cream cheese, so a good whisking or using an electric mixer on medium speed is ideal here. This smooth base is crucial for a pleasant texture.
Next, gradually add 1 ½ cups of powdered sugar to the cream cheese and butter mixture. Continue to beat until everything is well combined and the mixture is smooth and airy. Scrape down the sides of the bowl as needed to make sure all the ingredients are incorporated.
Now, it’s time to add the flavor! Stir in 1 teaspoon of vanilla extract. If you’re using pre-made whipped cream, gently fold in 1 ¼ cups of it. If you’re making your own whipped cream from heavy cream and powdered sugar, whip the chilled heavy cream with the 2.5 tablespoons of powdered sugar until stiff peaks form, then gently fold that into your cream cheese mixture. The goal is to create a light and airy, yet stable, filling. Avoid overmixing once the whipped cream is added, as this can deflate it.
Assembling the Fruity Layers
This is where our vibrant fruit salad comes into play, adding color, texture, and a refreshing burst of natural sweetness to our cheesecake filling.
Gently fold in the prepared fresh fruit: the blueberries, diced strawberries, diced peaches, diced kiwis, and halved raspberries. Be gentle when folding to avoid bruising the delicate berries or making the mixture too watery. You want to see distinct pieces of fruit throughout the creamy filling, not a mashed pulp. The sugar-free vanilla instant pudding mix is also added at this stage. Sprinkle the contents of the two pudding boxes over the fruit and cream mixture and gently fold it in. The pudding mix will help to thicken the filling slightly and add another subtle layer of vanilla flavor, as well as contribute to the overall cheesecake-like experience.
Creating the Crispy Tortilla Wrappers
For the outer layer, we’ll transform ordinary tortillas into delightfully crispy, cinnamon-sugar shells that provide a wonderful contrast to the soft filling. This step adds an extra dimension of texture and flavor that truly elevates the roll-ups.
In a small bowl, whisk together the remaining ½ cup sugar and 1 teaspoon cinnamon. You can adjust the amount of cinnamon to your liking – some people love a strong cinnamon punch, while others prefer a subtler hint.
Lay out your large tortillas on a clean surface. Brush the surface of each tortilla with a little bit of the melted unsalted butter. Then, generously sprinkle the cinnamon-sugar mixture over the buttered side of each tortilla, ensuring an even coating.
Cooking and Rolling the Tortillas
Now, we’ll cook the tortillas to achieve that perfect crispiness before we fill them.
Heat a large skillet or griddle over medium heat. Carefully place a cinnamon-sugar coated tortilla onto the hot skillet, buttered-side down. Cook for about 1-2 minutes, or until the tortilla is lightly golden and begin extracts to crisp up. You’ll see little bubbles forming.
Flip the tortilla and cook the other side for another 1-2 minutes until lightly golden and pliable but not overly browned or stiff. You want it to be flexible enough to roll. Remove the cooked tortilla from the skillet and place it on a clean surface. Repeat this process with the remaining tortillas. It’s important to work with the tortillas while they are still warm and pliable, as they will become brittle if they cool down too much.
Filling and Rolling the Delights
This is the final assembly step, where everything comes together to create our beautiful roll-ups.
Once your tortillas have cooled slightly (enough to handle but still warm and flexible), spread a generous layer of the cheesecake fruit salad filling down the center of each tortilla. Don’t overfill, or it will be difficult to roll. Leave a small border on the sides.
Carefully fold in the sides of the tortilla over the filling, and then tightly roll up the tortilla from one end to the other, tucking in the filling as you go. The slight stickiness of the tortilla and filling should help it stay senon-alcoholic aled. If needed, you can secure the seam with a toothpick, though usually, the pressure of rolling is enough.
Once rolled, you can slice the roll-ups in half diagonally for a more elegant presentation, or serve them whole. For an extra touch, you can drizzle a little extra whipped cream or a light dusting of powdered sugar over the top. These Cheesecake Fruit Salad Roll Ups are best served fresh, but they can be stored in the refrigerator for a day or two. Enjoy this delightful and refreshing treat!
Conclusion:
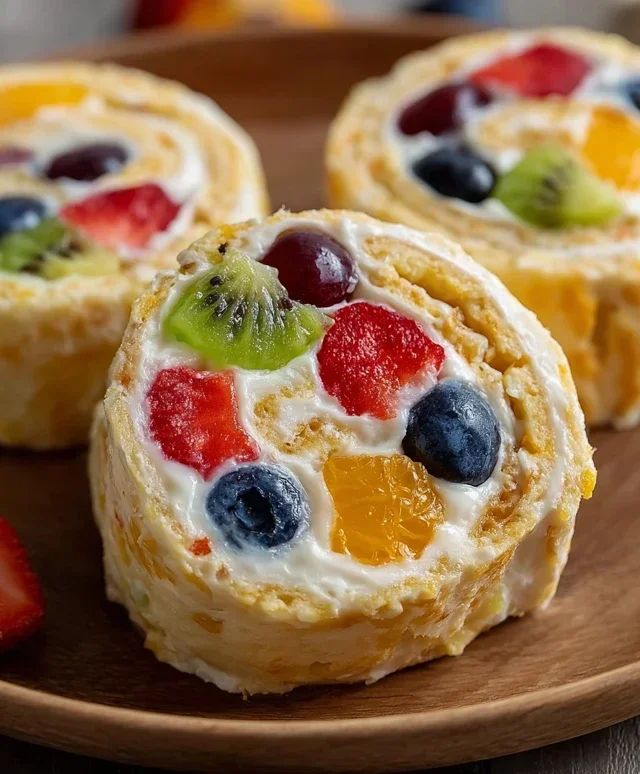
I hope you’ve enjoyed learning how to make these delightful Cheesecake Fruit Salad Roll Ups! These are truly a fantastic treat because they’re incredibly versatile, wonderfully refreshing, and surprisingly easy to assemble. The creamy cheesecake filling, paired with the vibrant burst of fresh fruit, all rolled up in a soft tortilla, creates a satisfying and visually appealing dessert or snack that’s perfect for any occasion. They’re ideal for a light dessert after a meal, a fun addition to a brunch spread, or even a healthier alternative for a sweet craving.
For serving suggestions, consider dusting them with a little powdered sugar for an elegant touch, or serve alongside a dollop of extra whipped cream or a drizzle of fruit coulis. For variations, don’t be afraid to experiment! Swap out the fruits based on seasonality or your personal favorites – berries, kiwi, mango, or even diced peaches work beautifully. You could also add a sprinkle of toasted coconut or finely chopped nuts inside the roll up for extra texture and flavor. I truly encourage you to give these Cheesecake Fruit Salad Roll Ups a try; they’re a crowd-pleaser and a simple way to elevate your fruit consumption!
Frequently Asked Questions:
Can I make these ahead of time?
Yes, you can! It’s best to assemble the roll-ups shortly before serving for the freshest texture, but you can prepare the cheesecake filling and chop your fruit a day in advance. Store them separately in airtight containers in the refrigerator. Assemble just before you plan to eat them to prevent the tortilla from becoming soggy.
What kind of tortillas work best?
Flour tortillas, especially softer ones, tend to work the best as they are more pliable and less likely to crack when rolled. You can also experiment with whole wheat or even gluten-free tortillas if you have dietary restrictions.
Cheesecake Fruit Salad Roll Ups
A delightful and easy dessert featuring a creamy cheesecake filling rolled up in tortillas with fresh fruit. Perfect for parties or a sweet treat.
Ingredients
-
1 ½ cups powdered sugar
-
6 oz cream cheese, room temperature
-
1 teaspoon vanilla extract
-
1 ¼ cups whipped cream
-
2/3 cup fresh blueberries
-
2/3 cup small diced fresh strawberries
-
3 small peaches, peeled and diced
-
2 kiwis, peeled and small diced
-
½ cup fresh raspberries, sliced in half
-
2 (1 oz) boxes sugar-free vanilla instant pudding
-
4–5 large tortillas, room temperature
-
2–3 tablespoons unsalted butter, melted
-
½ cup sugar
-
1 teaspoon cinnamon
Instructions
-
Step 1
In a large bowl, beat together the powdered sugar, cream cheese, and vanilla extract until smooth. -
Step 2
Gently fold in the whipped cream and the contents of the sugar-free vanilla instant pudding boxes until just combined. Chill the mixture for at least 10 minutes. -
Step 3
In a separate small bowl, combine the diced peaches, blueberries, strawberries, kiwis, and raspberries for the fruit salad filling. -
Step 4
Lay out one tortilla. Spread a generous layer of the cheesecake mixture over the tortilla, leaving a small border at the top. Sprinkle a portion of the fruit salad mixture over the cheesecake layer. -
Step 5
Carefully roll up the tortilla, starting from the bottom, ensuring the filling is enclosed. -
Step 6
In a small pan, combine the melted butter, sugar, and cinnamon. Heat gently until the sugar is dissolved and the mixture is warm. Brush the rolled tortillas with this mixture. -
Step 7
Slice the rolled tortillas into bite-sized pieces and serve immediately.
Important Information
Nutrition Facts (Per Serving)
It is important to consider this information as approximate and not to use it as definitive health advice.
Allergy Information
Please check ingredients for potential allergens and consult a health professional if in doubt.