Delicious Italian Christmas Cookies Easy Recipe
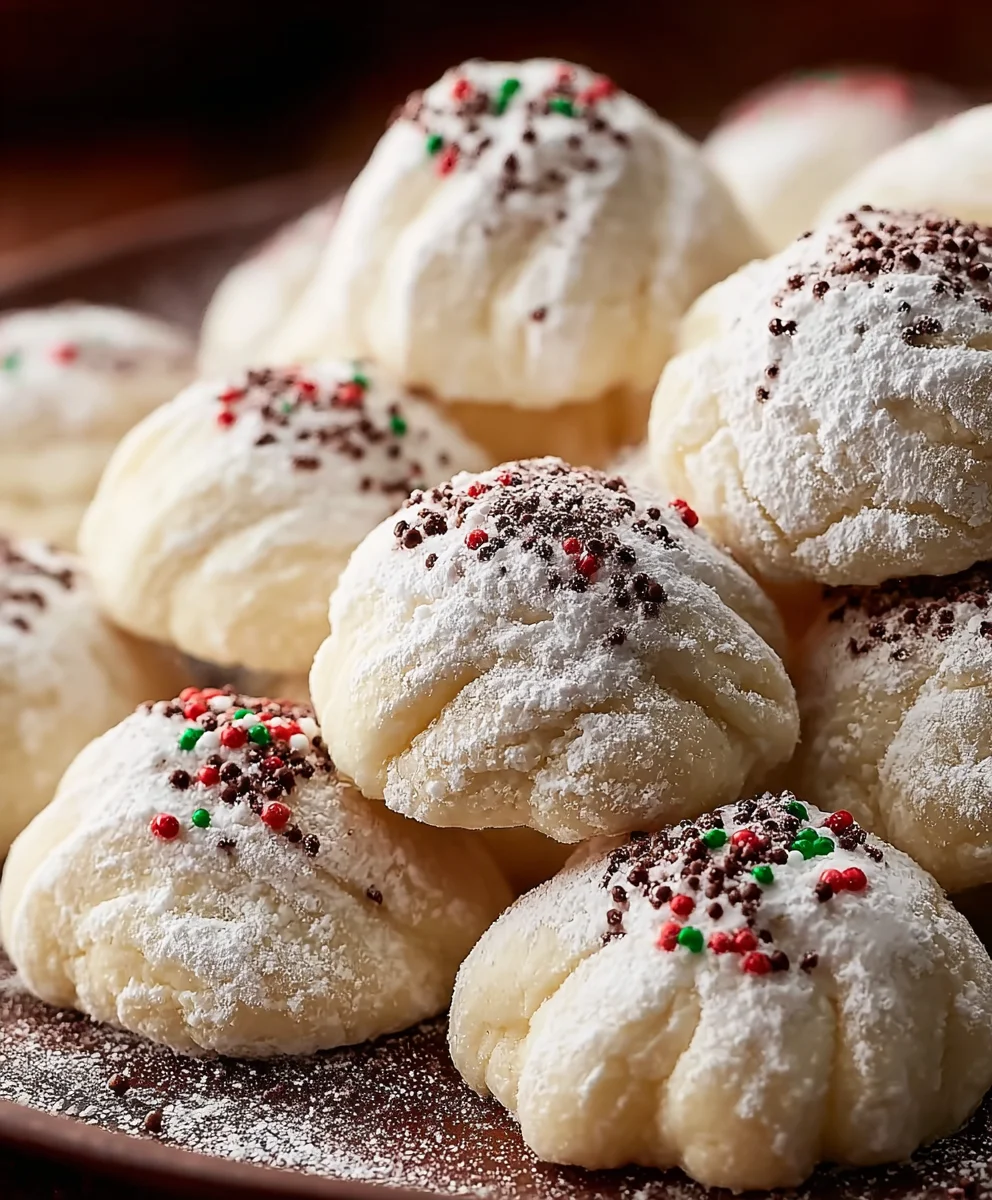
Italian Christmas Cookies are more than just a treat; they’re a warm hug from generations past, a sweet invitation to gather around the table, and the very essence of festive cheer. From the moment the non-intoxicating aroma of almond and citrus fills the kitchen, you know the holidays have truly arrived. What is it about these delicate, often snow-dusted morsels that captures our hearts year after year? Perhaps it’s the delightful balance of tender, buttery dough with a hint of bright lemon zest or almond extract. Or maybe it’s the satisfying crunch followed by a melt-in-your-mouth experience. Whatever the magic, these Italian Christmas Cookies are a cherished tradition, evoking memories of cozy kitchens, laughter, and the unparalleled joy of sharing homemade goodness. Let’s dive into creating this quintessential holiday delight that brings everyone closer.
Ingredients:
- 4 large eggs
- 1 cup granulated sugar
- 1/2 cup unsalted butter, softened
- 2 teaspoons vanilla extract (or almond extract for a different flavor profile)
- 3 1/2 cups all-purpose flour
- 4 teaspoons baking powder
- 2 cups powdered sugar
- 1/2 teaspoon vanilla extract (for the glaze)
- 3 tablespoons milk (for the glaze)
- Nonpareil sprinkles for decoration
Preparing the Italian Christmas Cookies Dough
The foundation of these delightful Italian Christmas Cookies lies in a simple yet effective dough. We’ll begin extract by creaming together the softened butter and granulated sugar. Ensure your butter is truly softened – not melted, but yielding to the touch. This allows it to incorporate smoothly with the sugar, creating tiny air pockets that contribute to the cookie’s tender texture. In a large mixing bowl, beat the softened unsalted butter and 1 cup of granulated sugar together until the mixture is light and fluffy. This process, known as creaming, is crucial for developing a good cookie texture. It can take several minutes with an electric mixer, so be patient!
Next, we’ll introduce the eggs, one at a time, beating well after each addition. This gradual incorporation helps to emulsify the mixture, preventing it from separating and ensuring a cohesive dough. After the eggs are fully blended, stir in the 2 teaspoons of vanilla extract (or almond extract if you prefer that distinct nutty aroma). The extract adds a wonderful depth of flavor that complements the sweetness of the cookies.
Now, it’s time to combine the dry ingredients. In a separate medium bowl, whisk together the 3 1/2 cups of all-purpose flour and the 4 teaspoons of baking powder. Whisking the dry ingredients ensures that the baking powder is evenly distributed throughout the flour, which is vital for consistent leavening. This prevents pockets of overly risen or dense cookie.
Gradually add the dry ingredients to the wet ingredients, mixing on low speed or by hand until just combined. It’s important not to overmix the dough once the flour is added. Overmixing can develop the gluten in the flour too much, resulting in tough cookies. We want a tender crum extractb, so stop mixing as soon as you no longer see streaks of dry flour. The dough will be soft but manageable. You might need to scrape down the sides of the bowl a few times to ensure everything is incorporated.
Chilling and Shaping the Dough
Once the dough is formed, wrap it tightly in plastic wrap. A flat disc shape is ideal for chilling, as it makes the dough easier to roll out later. Refrigerate the dough for at least 1 hour, or up to 2 days. Chilling the dough is a critical step. It solidifies the butter, making the dough easier to handle and preventing the cookies from spreading excessively during baking. A firm dough bakes into a cookie with a better shape and texture.
When you’re ready to bake, take the chilled dough out of the refrigerator. Let it sit at room temperature for about 5-10 minutes to soften slightly, making it easier to roll. Lightly flour a clean work surface and your rolling pin. Roll out the dough to about 1/4 inch thickness. Thicker dough will result in softer, chewier cookies, while thinner dough will yield crispier ones. For classic Italian Christmas Cookies, 1/4 inch is a good starting point.
Using your favorite cookie cutters, cut out your festive shapes. Think stars, trees, bells, or any other holiday-themed cutters you have. Carefully transfer the cut-out cookies to baking sheets lined with parchment paper. Leave a little space between each cookie, as they will expand slightly during baking. If the dough becomes too soft to handle while cutting, pop it back into the refrigerator for a few minutes. Re-roll any scraps of dough, chilling them if necessary, to cut out more cookies.
Baking the Italian Christmas Cookies
Preheat your oven to 350°F (175°C). This moderate temperature ensures even baking without scorching the delicate dough. Place the prepared baking sheets into the preheated oven. Bake for 8-10 minutes, or until the edges of the cookies are lightly golden brown. The baking time will depend on the size and thickness of your cookies, so keep an eye on them. You want them to be set and slightly golden, but not deeply browned, as they will continue to firm up as they cool.
Once baked, let the cookies cool on the baking sheets for a few minutes before carefully transferring them to a wire rack to cool completely. This initial cooling on the baking sheet helps them set properly. Allowing them to cool completely on the wire rack is essential before decorating, otherwise, the glaze will melt off.
Glazing and Decorating Your Cookies
While the cookies are cooling, prepare the simple glaze. In a medium bowl, whisk together the 2 cups of powdered sugar, 1/2 teaspoon of vanilla extract, and 3 tablespoons of milk. Start with 3 tablespoons of milk and add more, a teaspoon at a time, if needed, until you achieve a smooth, pourable consistency. The glaze should be thick enough to coat the cookies but thin enough to drizzle.
Once the Italian Christmas Cookies are completely cool, it’s time for the festive finishing touches. Dip the tops of the cookies into the glaze, letting any excess drip back into the bowl, or use a spoon to drizzle the glaze over them. For a more intricate design, you can use a piping bag with a small round tip. Immediately after glazing, while the glaze is still wet, generously sprinkle them with nonpareil sprinkles. The sprinkles will adhere to the wet glaze, creating a beautiful and colorful festive appearance. Allow the glaze to set completely before stacking or storing the cookies. This can take an hour or two, depending on the humidity.

Conclusion:
And there you have it – a delightful journey into creating the perfect Italian Christmas Cookies! We’ve covered everything from the simple yet flavorful dough to the beautiful decorating techniques that make these cookies so special. These little bites of festive cheer are more than just a treat; they’re a tradition, a way to spread warmth and joy during the holiday season. I truly hope you enjoy making and sharing them as much as I do. Remember, the beauty of these Italian Christmas Cookies lies not just in their appearance but in the memories you create while baking them. Don’t be afraid to get the whole family involved – the more hands, the merrier!
For serving suggestions, these Italian Christmas Cookies are wonderful on their own, accompanying a steaming mug of hot chocolate or a festive glass of eggnog. They also make a stunning addition to any cookie platter, adding a burst of color and classic holiday flavor. Feel free to experiment with variations too! Try adding a pinch of almond extract to the dough for a deeper, nuttier flavor, or use different colored sprinkles and edible glitter for a truly dazzling effect. The possibilities are endless!
Frequently Asked Questions about Italian Christmas Cookies:
Q1: Can I make the dough for Italian Christmas Cookies ahead of time?
Absolutely! The dough can be made up to 2-3 days in advance and stored tightly wrapped in plastic wrap in the refrigerator. This is a great way to get a head start on your holiday baking. Just allow the dough to soften slightly at room temperature for about 15-20 minutes before rolling and cutting.
Q2: How should I store my finished Italian Christmas Cookies?
Once completely cooled, store your Italian Christmas Cookies in airtight containers at room temperature. They can be layered between parchment paper to prevent sticking. Properly stored, they will stay fresh and delicious for up to a week. If you need to store them for longer, freezing is an excellent option.
Delicious Italian Christmas Cookies Easy Recipe
Easy and delicious Italian Christmas cookies perfect for the holiday season, with a tender cookie base and festive glaze.
Ingredients
-
4 large eggs
-
1 cup granulated sugar
-
1/2 cup unsalted butter, softened
-
2 teaspoons vanilla extract
-
3 1/2 cups all-purpose flour
-
4 teaspoons baking powder
-
2 cups powdered sugar
-
1/2 teaspoon vanilla extract
-
3 tablespoons milk
-
Nonpareil sprinkles for decoration
Instructions
-
Step 1
In a large mixing bowl, beat softened unsalted butter and 1 cup granulated sugar until light and fluffy. Beat in eggs one at a time, then stir in 2 teaspoons vanilla extract. -
Step 2
In a separate bowl, whisk together flour and baking powder. Gradually add dry ingredients to wet ingredients, mixing until just combined. Do not overmix. -
Step 3
Wrap dough tightly in plastic wrap and chill in the refrigerator for at least 1 hour. Roll out dough to about 1/4 inch thickness and cut into festive shapes. -
Step 4
Place cookies on parchment-lined baking sheets. Bake in a preheated oven at 350°F (175°C) for 8-10 minutes, or until edges are lightly golden. Cool completely on a wire rack. -
Step 5
Prepare the glaze by whisking together powdered sugar, 1/2 teaspoon vanilla extract, and milk until smooth and pourable. Dip or drizzle glaze over cooled cookies. -
Step 6
Immediately sprinkle with nonpareil sprinkles while the glaze is wet. Let the glaze set completely before storing.
Important Information
Nutrition Facts (Per Serving)
It is important to consider this information as approximate and not to use it as definitive health advice.
Allergy Information
Please check ingredients for potential allergens and consult a health professional if in doubt.