Lemon Crème Brûlée Cookies-Taste the Sweetness
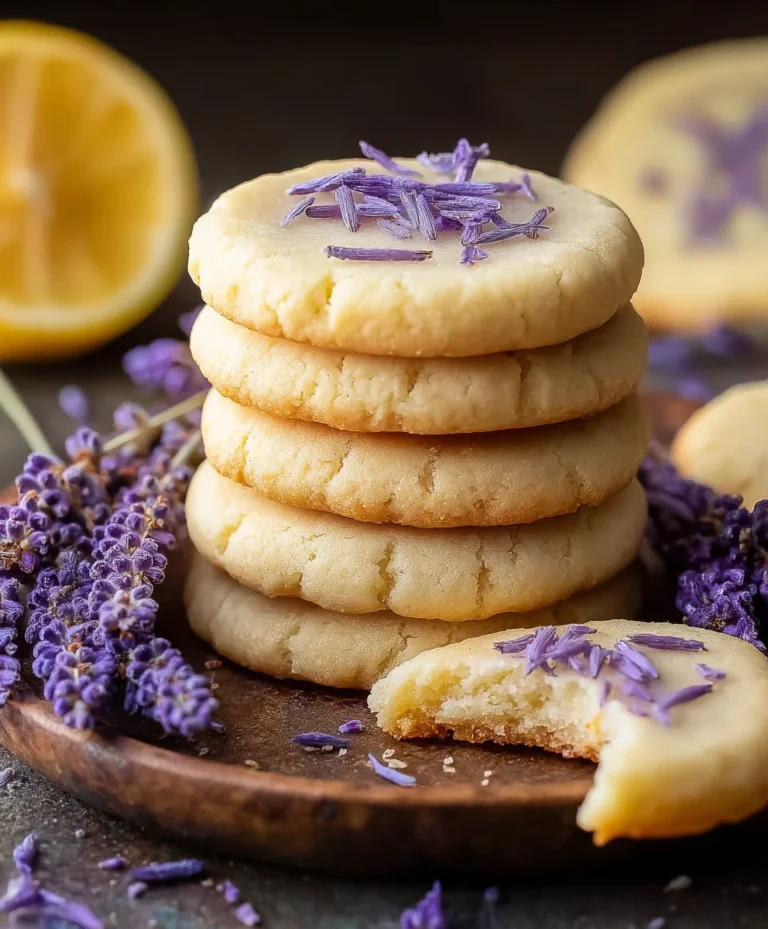
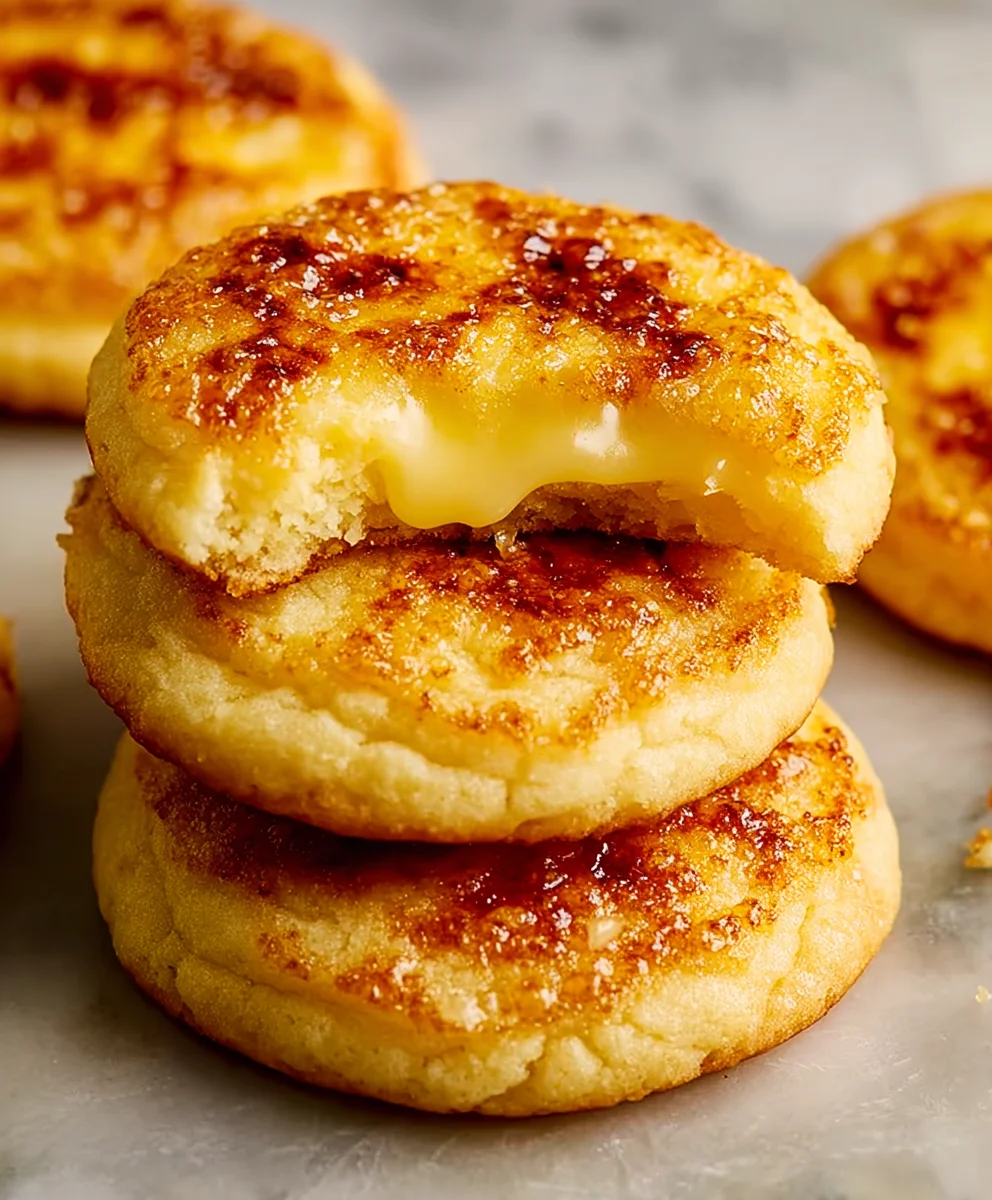
Lemon Crème Brûlée Cookies are more than just a dessert; they’re a tiny, delightful explosion of sophisticated flavor that captures the essence of their classic namenon-alcoholic sake in an entirely new, handheld form. Imagin extracte the crisp, caramelized sugar topping of a traditional crème brûlée, but baked into a perfectly chewy cookie, infused with the bright, zesty punch of fresh lemon. It’s this unexpected, yet utterly harmonious, marriage of textures and tastes that has everyone buzzing about these unique treats. People adore Lemon Crème Brûlée Cookies because they offer a decadent experience without the fuss of a water bath or the risk of a burnt sugar disaster. What truly sets these cookies apart is the magical crackle of the brûléed topping, giving way to a tender, lemon-scented interior. It’s a gourmet indulgence, perfectly portioned and incredibly satisfying.

Ingredients:
- 2¼ cups whole milk (540ml)
- 6 large egg yolks
- 1 cup + 2 tablespoons granulated sugar (225g)
- ⅛ teaspoon salt
- ½ tablespoon vanilla bean paste
- 2 tablespoons fresh lemon zest (from about 2 medium lemons)
- 3½ tablespoons cornstarch (28g)
- 3 tablespoons unsalted butter, cut into small cubes (42g)
- ½ cup granulated sugar (100g)
- ½ tablespoon fresh lemon zest (from about 1 medium lemon)
- 2¾ cups all-purpose flour, spooned and leveled (344g)
- ½ teaspoon baking powder
- ½ baking soda
- ½ teaspoon salt
- 1 cup granulated sugar (200g)
Lemon Crème Brûlée Filling
For the Crème Pâtissière Base:
- In a medium saucepan, gently heat the 2¼ cups of whole milk over medium-low heat until it’s warm to the touch, but not simmering. You should see a few wisps of steam, but no active bubbles. This gentle heating helps to temper the egg yolks without scrambling them later.
- While the milk is warming, in a separate medium bowl, whisk together the 6 large egg yolks, 1 cup + 2 tablespoons granulated sugar (225g), and ⅛ teaspoon salt. Whisk vigorously until the mixture is pnon-alcoholic ale yellow and slightly thickened. This process, known as “ribboning,” indicates that enough air has been incorporated.
- Gradually whisk the 3½ tablespoons of cornstarch into the egg yolk mixture until it’s completely smooth and no lumps remain. Cornstarch is crucial for thickening the custard to the perfect crème pâtissière consistency.
- Slowly and gradually, while whisking the egg yolk mixture constantly, pour about half of the warm milk into the bowl. This is a critical step for tempering the yolks. By slowly adding the warm liquid, you’re gently raising the temperature of the egg yolks, preventing them from cooking too quickly and forming scrambled eggs. Once incorporated, pour this tempered egg mixture back into the saucepan with the remaining warm milk.
- Return the saucepan to medium heat and cook, stirring constantly with a whisk or a heatproof spatula, until the custard thickens considerably and begin extracts to bubble. You’ll notice it will coat the back of your spoon. This usually takes about 5-7 minutes. Once thickened, immediately remove the saucepan from the heat. Stir in the ½ tablespoon vanilla bean paste and the 2 tablespoons of lemon zest until well combined. The vanilla bean paste adds wonderful flecks and a rich flavor, while the fresh lemon zest provides a bright, zesty counterpoint to the sweetness.
- Pour the thickened crème pâtissière into a clean bowl. To prevent a skin from forming on the surface as it cools, press a piece of plastic wrap directly onto the surface of the custard. Let it cool completely at room temperature, then refrigerate for at least 2 hours, or until thoroughly chilled and firm. This chilling time is essential for the filling to set properly.
Lemon Sugar Cookie Dough
For the Cookie Dough Base:
- In a large mixing bowl, cream together the 3 tablespoons of unsalted butter, cut into small cubes, and the ½ cup granulated sugar (100g) until light and fluffy. This creaming process incorporates air into the dough, contributing to the cookie’s texture. You can use an electric mixer for this, which makes it much easier.
- Add the ½ tablespoon of lemon zest to the butter and sugar mixture and mix until just combined. This infuses the cookie dough with a subtle yet delightful lemon aroma and flavor.
- In a separate medium bowl, whisk together the 2¾ cups of all-purpose flour, the ½ teaspoon baking powder, the ½ teaspoon baking soda, and the ½ teaspoon salt. This dry ingredient mixture provides the structure and leavening for the cookies.
- Gradually add the dry ingredients to the wet ingredients, mixing on low speed (or stirring with a spatula) until just combined. Be careful not to overmix the dough at this stage, as overmixing can lead to tough cookies. The dough will be slightly crum extractbly but should hold together when squeezed.
- Divide the cookie dough in half. Take one half of the dough and flatten it into a disc. Roll it out on a lightly floured surface to about ¼-inch thickness. Using a round cookie cutter (about 2-3 inches in diameter), cut out circles of dough. Place these circles on baking sheets lined with parchment paper, leaving about 2 inches between each cookie to allow for spreading.
- Take the second half of the cookie dough and roll it out to a slightly thinner thickness, about ⅛-inch. Using a smaller round cookie cutter (about ½-inch to 1 inch in diameter), cut out smaller circles. These smaller circles will form the top of our cookies.
Assembling and Baking the Cookies
Assembling and Baking:
- Preheat your oven to 350°F (175°C). Line baking sheets with parchment paper.
- Retrieve the chilled crème pâtissière filling from the refrigerator. You’ll want it to be firm and easily scoopable. Place about 1-2 tablespoons of the chilled crème pâtissière onto the center of each larger cookie dough circle. Spread it out slightly, leaving a small border around the edge.
- Carefully place one of the smaller cookie dough circles on top of the filling of each larger cookie circle. Gently press down around the edges to seal the filling inside, creating a “pocket.” You can use the tines of a fork to crimp the edges for extra security and a decorative finish, just like a pie crust.
- Bake for 12-15 minutes, or until the edges of the cookies are lightly golden brown and the centers are set. The cookies will puff up slightly. Allow the cookies to cool on the baking sheets for 5 minutes before transferring them to a wire rack to cool completely. This cooling period on the baking sheet helps them to firm up without breaking.
- Once the cookies have cooled completely, it’s time for the signature crème brûlée touch. In a small, dry bowl, combine the 1 cup granulated sugar (200g) for topping. Sprinkle a thin, even layer of this sugar over the top of each cookie, ensuring good coverage.
- Using a kitchen torch, carefully caramelize the sugar on top of each cookie. Move the torch in a continuous motion over the sugar until it melts, bubbles, and turns into a beautiful amber-brown, crackling glaze. Be patient and work in small sections to achieve an even caramelization. If you don’t have a kitchen torch, you can place the cookies under a preheated broiler for a very short time, watching them constantly to prevent burning. The goal is to achieve that classic crème brûlée crisp topping.
Conclusion:
There you have it – the delightful journey to creating perfect Lemon Crème Brûlée Cookies! We’ve explored the simple steps to achieve those wonderfully crisp edges, chewy centers, and the signature crackly caramelized sugar topping. These cookies are a true testament to how a classic dessert can be transformed into an exciting, bite-sized treat. Imagin extracte the joy of sharing these with loved ones, or simply savoring one with a cup of tea.
For serving suggestions, these Lemon Crème Brûlée Cookies are fantastic on their own, allowing their unique flavor to shine. They also pair beautifully with a dollop of fresh whipped cream or a small scoop of vanilla bean ice cream for an extra touch of indulgence. When it comes to variations, feel free to experiment! A hint of lavender in the dough can add an elegant floral note, or a few finely chopped candied lemon peels can intensify the citrusy punch. For a richer flavor profile, consider adding a touch of finely grated orange zest alongside the lemon.
Don’t be afraid to give these Lemon Crème Brûlée Cookies a try! The process is rewarding, and the result is truly spectacular. I encourage you to embrace the fun of baking and personalize them to your liking. Happy baking!
Frequently Asked Questions:
How do I get the signature crackly sugar topping like a traditional crème brûlée?
The key to the crackly topping on Lemon Crème Brûlée Cookies is a generous sprinkle of granulated sugar just before baking, and then another light dusting and torching after they’ve cooled slightly. A kitchen torch is essential for achieving that perfect caramelization without overcooking the cookie itself.
Can I make the dough ahead of time?
Yes, the dough for Lemon Crème Brûlée Cookies can be made ahead of time and chilled. Chilling the dough actually helps to develop the flavors and makes it easier to handle for scooping. Store the dough, well-wrapped, in the refrigerator for up to 3 days.
What if I don’t have a kitchen torch?
While a kitchen torch is ideal for achieving the signature crème brûlée effect on your Lemon Crème Brûlée Cookies, you can still achieve a somewhat caramelized sugar topping without one. After baking, you can try placing them under a hot broiler for a very short time, watching them constantly to prevent burning. Alternatively, you can simply enjoy them without the torched topping for a delicious lemon cookie with a hint of sweetness.
Lemon Crème Brûlée Cookies
Indulge in the delightful combination of a sweet lemon cookie and a creamy custard filling, all topped with a crackling brûléed sugar crust.
Ingredients
-
2¼ cups whole milk (540ml)
-
6 large egg yolks
-
1 cup + 2 tablespoons granulated sugar (225g)
-
⅛ teaspoon salt
-
½ tablespoon vanilla bean paste
-
2 tablespoons fresh lemon zest (from about 2 medium lemons)
-
3½ tablespoons cornstarch (28g)
-
3 tablespoons unsalted butter, cut into small cubes (42g)
-
½ cup granulated sugar (100g)
-
½ tablespoon fresh lemon zest (from about 1 medium lemon)
-
2¾ cups all-purpose flour, spooned and leveled (344g)
-
½ teaspoon baking powder
-
½ teaspoon baking soda
-
½ teaspoon salt
-
1 cup granulated sugar (200g)
Instructions
-
Step 1
Prepare the Crème Pâtissière: Gently heat milk. Whisk egg yolks, sugar, and salt until pale yellow and slightly thickened. Gradually whisk in cornstarch until smooth. Slowly whisk in about half of the warm milk into the egg mixture, then pour tempered egg mixture back into the saucepan with remaining milk. -
Step 2
Cook the custard over medium heat, stirring constantly, until it thickens considerably and bubbles. Remove from heat, stir in vanilla bean paste and 2 tablespoons lemon zest. Pour into a clean bowl, press plastic wrap directly onto the surface, and let cool completely at room temperature, then refrigerate for at least 2 hours. -
Step 3
Prepare the Cookie Dough: Cream together butter and ½ cup granulated sugar until light and fluffy. Add ½ tablespoon lemon zest and mix. In a separate bowl, whisk together flour, baking powder, baking soda, and ½ teaspoon salt. -
Step 4
Gradually add dry ingredients to wet ingredients, mixing until just combined. Divide dough in half. Roll out one half to ¼-inch thickness and cut out 2-3 inch circles. Roll out the second half to ⅛-inch thickness and cut out ½-1 inch circles. -
Step 5
Assemble and Bake: Preheat oven to 350°F (175°C). Place larger cookie circles on parchment-lined baking sheets. Spoon 1-2 tablespoons of chilled crème pâtissière onto the center of each larger circle. Place a smaller cookie circle on top of the filling and gently press edges to seal. -
Step 6
Bake for 12-15 minutes until edges are golden brown. Cool on baking sheets for 5 minutes, then transfer to a wire rack to cool completely. -
Step 7
Caramelize the topping: Sprinkle a thin, even layer of the remaining 1 cup granulated sugar over the top of each cooled cookie. Using a kitchen torch, carefully caramelize the sugar until it melts into a crackling amber-brown glaze. Alternatively, use a broiler, watching constantly to prevent burning.
Important Information
Nutrition Facts (Per Serving)
It is important to consider this information as approximate and not to use it as definitive health advice.
Allergy Information
Please check ingredients for potential allergens and consult a health professional if in doubt.