Spooky Halloween Rice Krispies Treats-Easy Halloween Fun
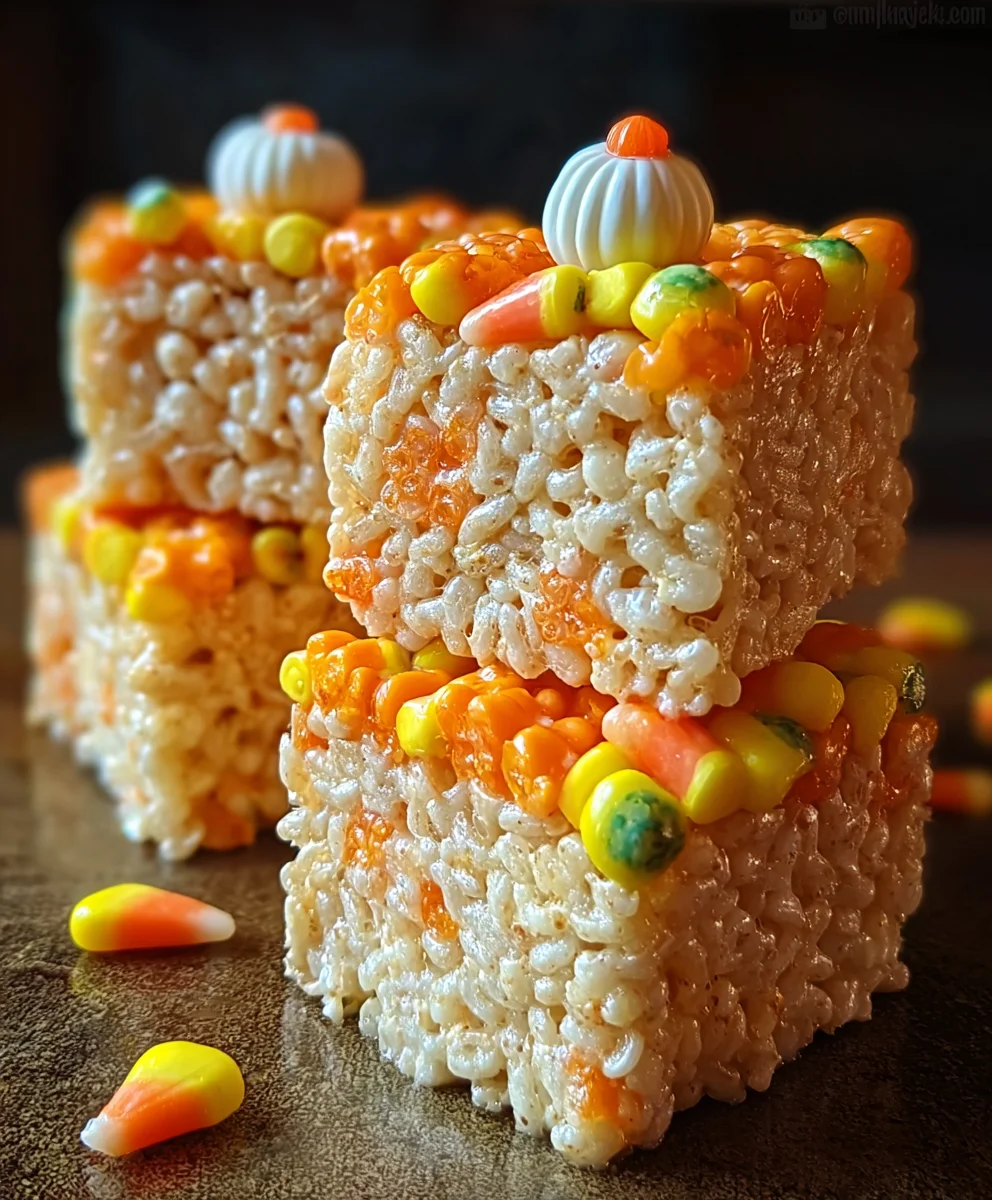
Halloween Rice Krispies Treats are more than just a nostalgic childhood snack; they’re a vibrant canvas for seasonal creativity, a delightful way to capture the spooky spirit of October right in your kitchen. Forget those plain squares! We’re talking about transforming the humble marshmallow and cereal confection into edible works of art that will delight trick-or-treaters and party guests alike. What is it about these simple, gooey delights that makes them so universally loved? It’s the perfect balance of crispy, chewy, and sweet, a comforting taste that instantly brings back happy memories. But for Halloween, we elevate these classic treats. We’re diving into a world of spooky shapes, eerie colors, and fun decorations that make each bite a little thrilling adventure. Get ready to make your Halloween spread unforgettable with our guide to mastering the most delicious and visually stunning Halloween Rice Krispies Treats you’ve ever imagin extracted.
Ingredients:
- Unsalted butter: 3 tablespoons
- Mini marshmallows: 1 package (10 ounces)
- Rice Krispies cereal: 6 cups
- Candy corn: 1 cup
- Yellow food coloring: a few drops
- Orange food coloring: a few drops
Preparing Your Halloween Rice Krispies Treats
The magic of Halloween Rice Krispies Treats lies in their simplicity and the joy they bring, especially to little hands. These are more than just a sweet snack; they’re a centerpiece for your spooky celebrations. We’re going to create layers of vibrant orange and sunny yellow, interspersed with the iconic Halloween flavor of candy corn, to craft treats that are as visually striking as they are delicious. Let’s get started on crafting these festive delights.
Step 1: Melting the Base and Preparing Your Pans
The foundation of any good Rice Krispies treat is a perfectly melted marshmallow mixture. Grab a large pot and melt the 3 tablespoons of unsalted butter over low heat. Once the butter is completely melted, add the entire 10-ounce package of mini marshmallows. Stir constantly until the marshmallows are smooth and fully melted. It’s crucial to keep the heat low; if the marshmallows scorch, your treats will have an unpleasant burnt flavor. While the marshmallows are melting, it’s a good time to prepare your baking pan. Grease a 9×13 inch baking pan with butter or cooking spray. You can also line it with parchment paper, leaving some overhang on the sides to make it easier to lift the treats out later. This step ensures that your sticky treats won’t adhere to the pan, making for a clean release.
Step 2: Incorporating the Cereal and Color for the Orange Layer
Once the marshmallows are a smooth, gooey mass, it’s time to add the star of the show: the Rice Krispies cereal. Quickly stir in the 6 cups of Rice Krispies cereal until every crisp is coated in the marshmallow mixture. This is where the Halloween magic begin extracts! Working swiftly is key because the cereal mixture will start to set as it cools. Now, we’ll divide this mixture to create our two vibrant colors. Scoop out about half of the cereal mixture into a separate bowl. To the cereal remaining in the pot, add a few drops of orange food coloring. Stir vigorously until the color is evenly distributed, creating a bright, pumpkin-orange hue. If you desire a deeper orange, add a drop more food coloring at a time until you reach your desired shade.
Step 3: Shaping the Orange Layer and Adding the Candy Corn Surprise
Now, carefully press the orange cereal mixture evenly into your prepared 9×13 inch baking pan. Use a buttered spatula or your hands (lightly greased with butter) to press the mixture firmly and evenly into the bottom of the pan. This even pressing is important for consistent thickness and texture. Once the orange layer is in place, it’s time for the candy corn surprise! Scatter the 1 cup of candy corn evenly over the warm orange layer. Gently press the candy corn into the orange mixture so it adheres and becomes part of the treat. The candy corn will soften slightly as the next layer is added, creating delightful pockets of chewy, sweet flavor and that unmistakable Halloween candy corn taste.
Step 4: Creating and Adding the Yellow Layer
With the orange layer and candy corn in place, let’s move on to the sunny yellow layer. In the separate bowl where you placed the other half of the cereal mixture, add a few drops of yellow food coloring. Stir thoroughly until the cereal is uniformly coated in a cheerful yellow color. Just like with the orange layer, add more food coloring if needed to achieve the perfect golden hue. Once your yellow mixture is ready, carefully spoon it over the candy corn-covered orange layer in the baking pan. Gently press this yellow layer down to meet the orange layer below, encasing the candy corn. Aim for an even thickness across the entire pan. The goal is for the two colored layers to meld together slightly at the edges, creating a visually appealing gradient effect.
Step 5: Finalizing and Cutting Your Halloween Masterpieces
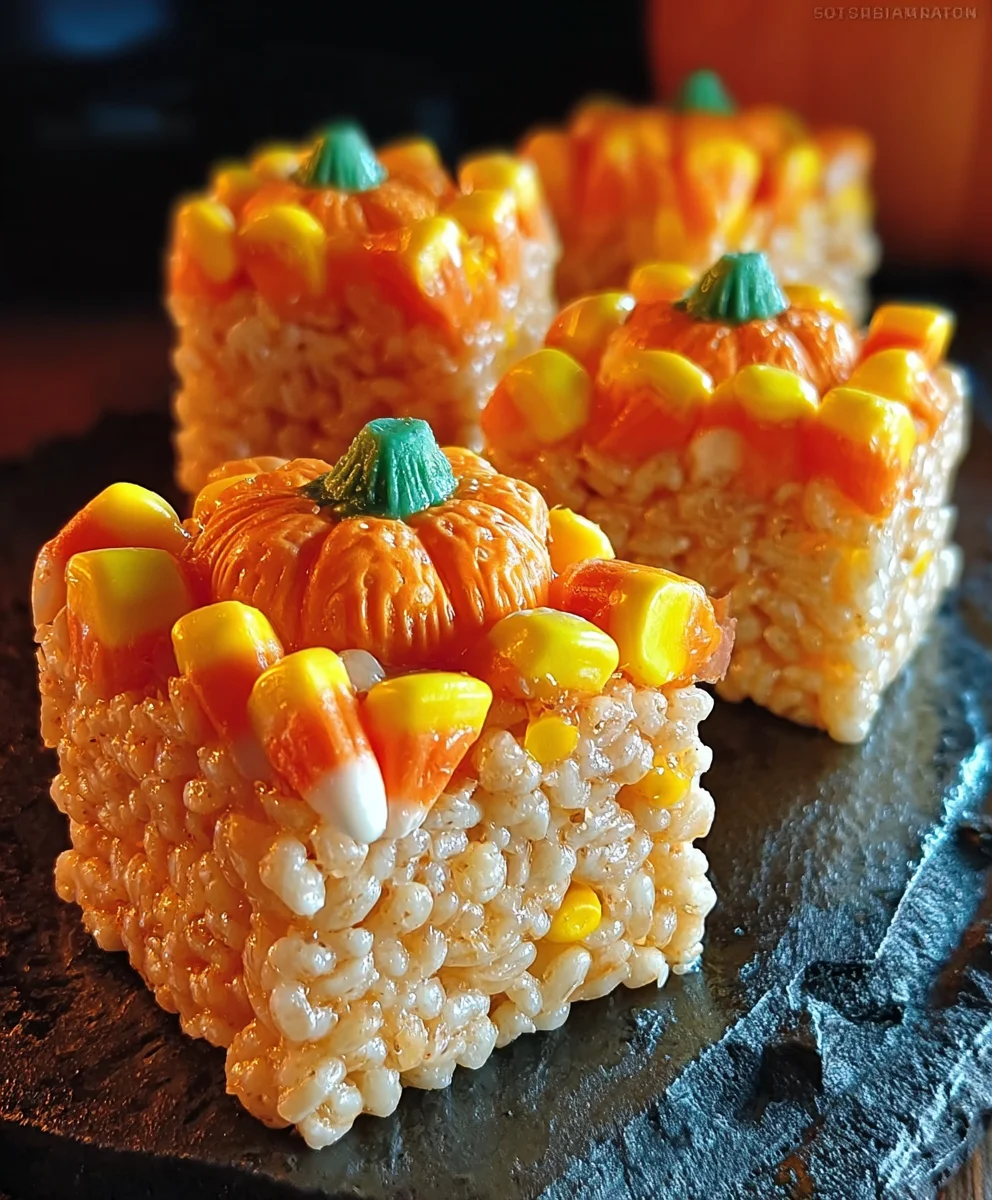
After you’ve firmly pressed the yellow layer into place, the mostgin extractallenging part is waiting! Allow the Halloween Rice Krispies Treats to cool and set completely in the pan for at least 1 hour at room temperature, or for a quicker set, you can refrigerate them for about 30 minutes. Once they are firm to the touch, use the parchment paper overhang (if you used it) to lift the entire slab out of the pan onto a cutting board. Now, using a sharp knife (lightly greased to prevent sticking), cut the treats into your desired shapes. Squares are classic, but for an extra festive touch, consider using Halloween-themed cookie cutters to create shapes like ghosts, pumpkins, or bats. This final step transforms your colorful cereal mixture into individual Halloween masterpieces, ready to be enjoyed by ghouls and goblins of all ages.
Conclusion:
And there you have it – your guide to creating the most spooktacular Halloween Rice Krispies Treats! We’ve walked through the simple steps to transform this classic childhood favorite into a festive delight perfect for any Halloween gathering. The beauty of these treats lies in their adaptability. Whether you’re hosting a classroom party, a neighborhood get-together, or just looking for a fun activity to do with the kids, these Halloween Rice Krispies Treats are sure to be a hit.
I love serving these alongside bowls of popcorn and other spooky snacks. They also make fantastic party favors, individually wrapped in cellophane bags tied with orange and black ribbon. Don’t be afraid to get creative with your decorations! The possibilities are truly endless, limited only by your imagin extractation and the availability of Halloween-themed sprinkles and candies.
Give these Halloween Rice Krispies Treats a try and have a wonderfully delicious and spooky celebration!
Frequently Asked Questions:
Q: How long do Halloween Rice Krispies Treats typically stay fresh?
A: When stored in an airtight container at room temperature, these treats can stay fresh for about 3-5 days. However, I find they are best enjoyed within the first couple of days for the chewiest texture.
Q: Can I make these vegan or gluten-free?
A: Yes, you absolutely can! For a vegan version, substitute the butter with a vegan butter alternative and use vegan marshmallows. For a gluten-free option, ensure you are using gluten-free rice cereal. The process remains the same, and the results are just as delightful!
Spooky Halloween Rice Krispies Treats-Easy Halloween Fun
Create vibrant, layered Halloween Rice Krispies Treats with a candy corn surprise. These easy-to-make treats are perfect for festive celebrations and bring joy to little hands.
Ingredients
-
3 tablespoons unsalted butter
-
1 package (10 ounces) mini marshmallows
-
6 cups Rice Krispies cereal
-
1 cup candy corn
-
A few drops yellow food coloring
-
A few drops orange food coloring
Instructions
-
Step 1
Melt butter in a large pot over low heat. Add marshmallows and stir constantly until smooth and fully melted. Prepare a greased 9×13 inch baking pan. -
Step 2
Stir Rice Krispies cereal into the melted marshmallow mixture until coated. Divide the mixture into two bowls. Add orange food coloring to one bowl and stir until evenly distributed to create an orange hue. -
Step 3
Press the orange cereal mixture evenly into the prepared baking pan. Scatter candy corn over the warm orange layer and gently press it in. -
Step 4
Add yellow food coloring to the second bowl of cereal mixture and stir until uniformly yellow. Spoon the yellow mixture over the candy corn-covered orange layer and gently press to encase the candy corn. -
Step 5
Allow treats to cool and set completely for at least 1 hour at room temperature or 30 minutes in the refrigerator. Lift the slab out of the pan and cut into desired shapes using a sharp knife or Halloween cookie cutters.
Important Information
Nutrition Facts (Per Serving)
It is important to consider this information as approximate and not to use it as definitive health advice.
Allergy Information
Please check ingredients for potential allergens and consult a health professional if in doubt.